
This site is a work in progress and will continue to change as our software evolves. Every effort will be made to publish updates promptly as they are released. Please email any questions or comments to pburgio@foscd.com.
Planning #

In This Section #
- Introduction
- Budget Allocation Tool
- Target FCI Tool
- Planning Tool
- Budgeting Tool
Introduction #
When used together or as individual elements, the four components of the FOScore® Planning Module provide clients with a flexible set of tools leading to data-informed reports that can be used in capital project discussions, annual facility maintenance budgeting, targeted allocation of scarce resources, and more.
Budget Allocation Tool Overview #
The Budget Allocation Tool offers several pre-defined algorithms to automatically select deficiencies to remediate based on your budget. The tool also supports building criticality and missionality in determining which deficiencies to cure.
Users can save a budget allocation result as a project:
- Run your allocation
- Click Save As Project
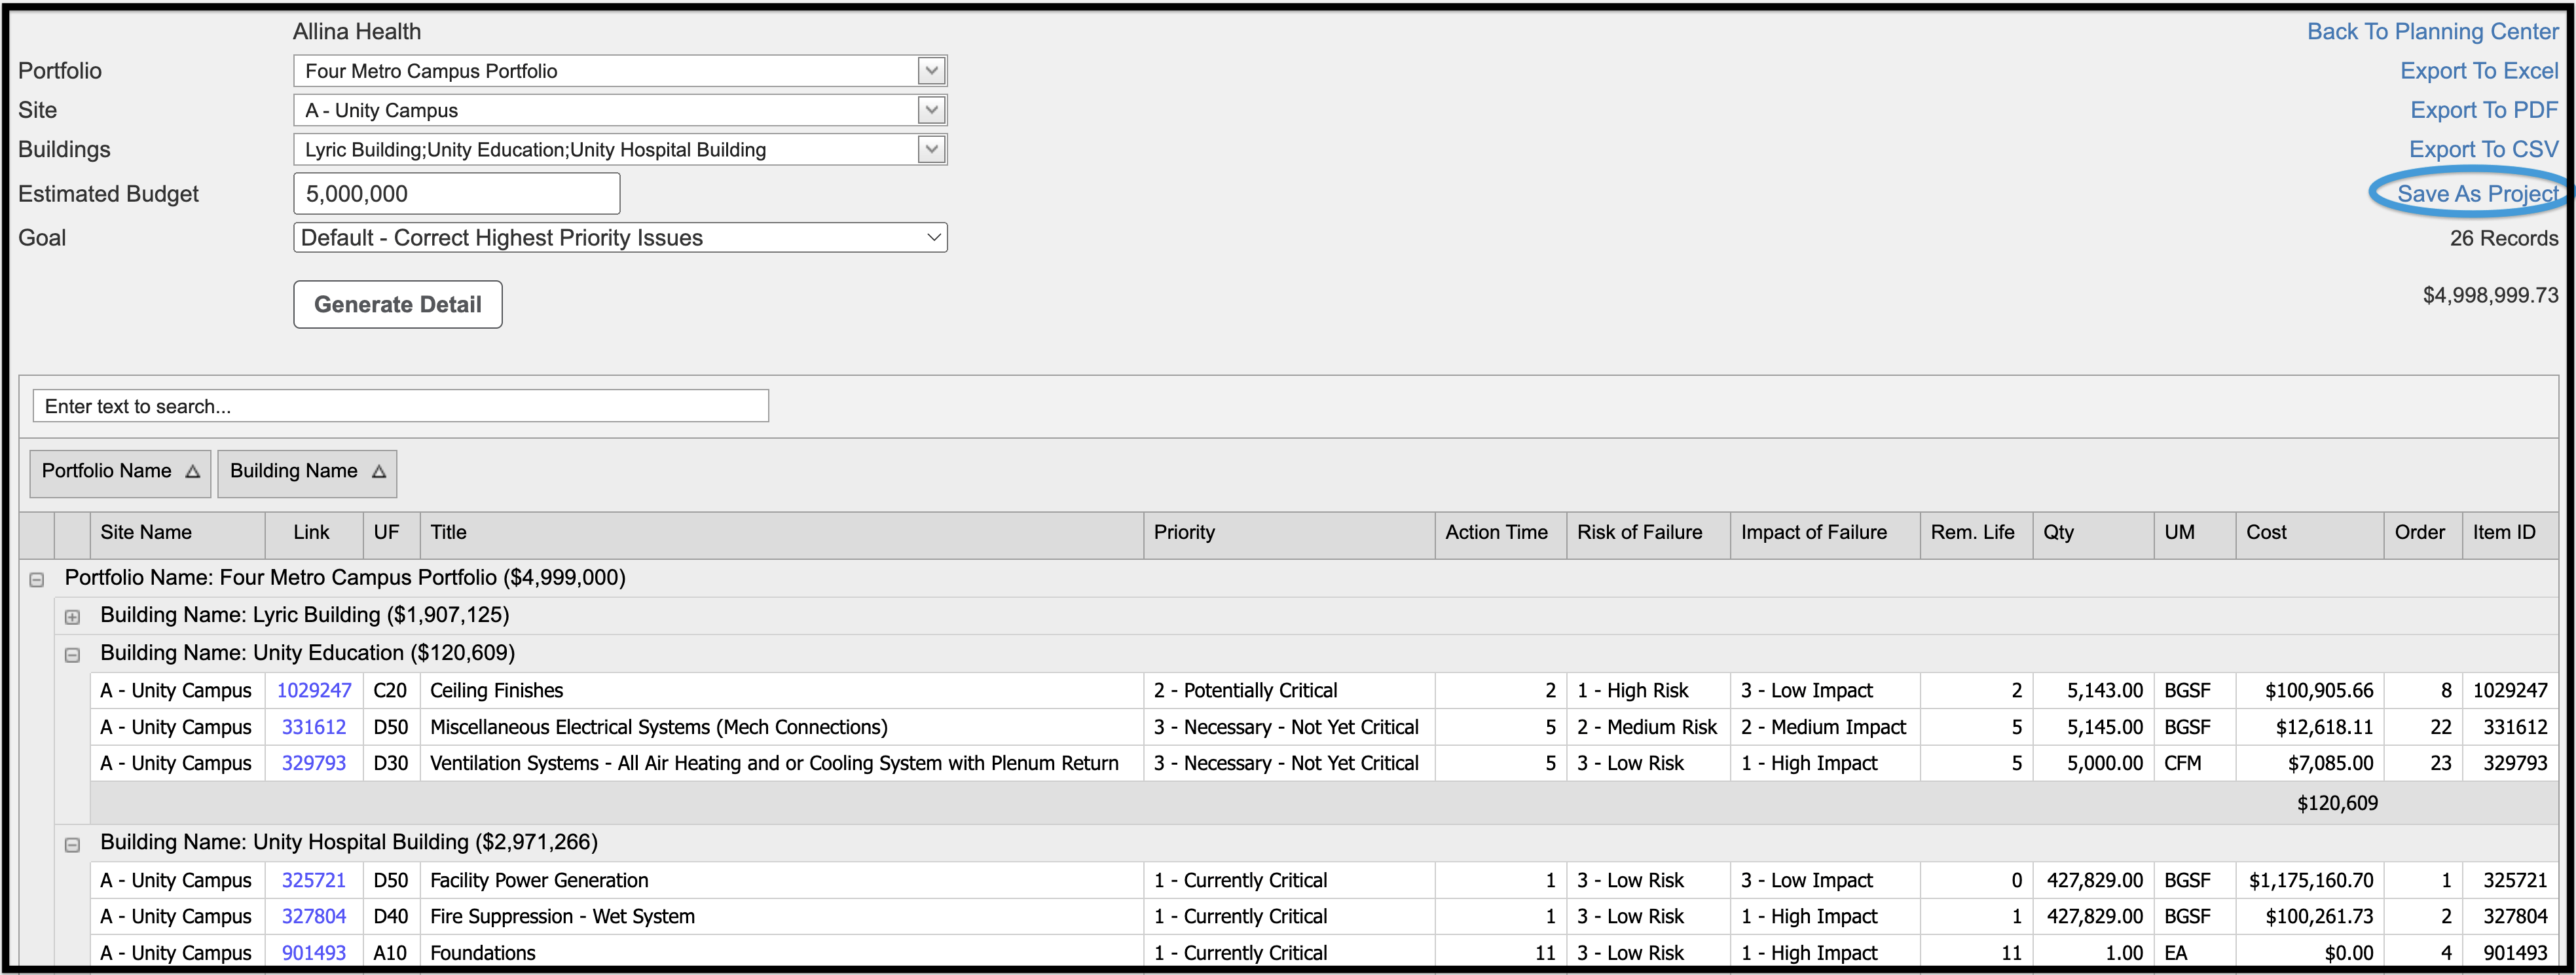
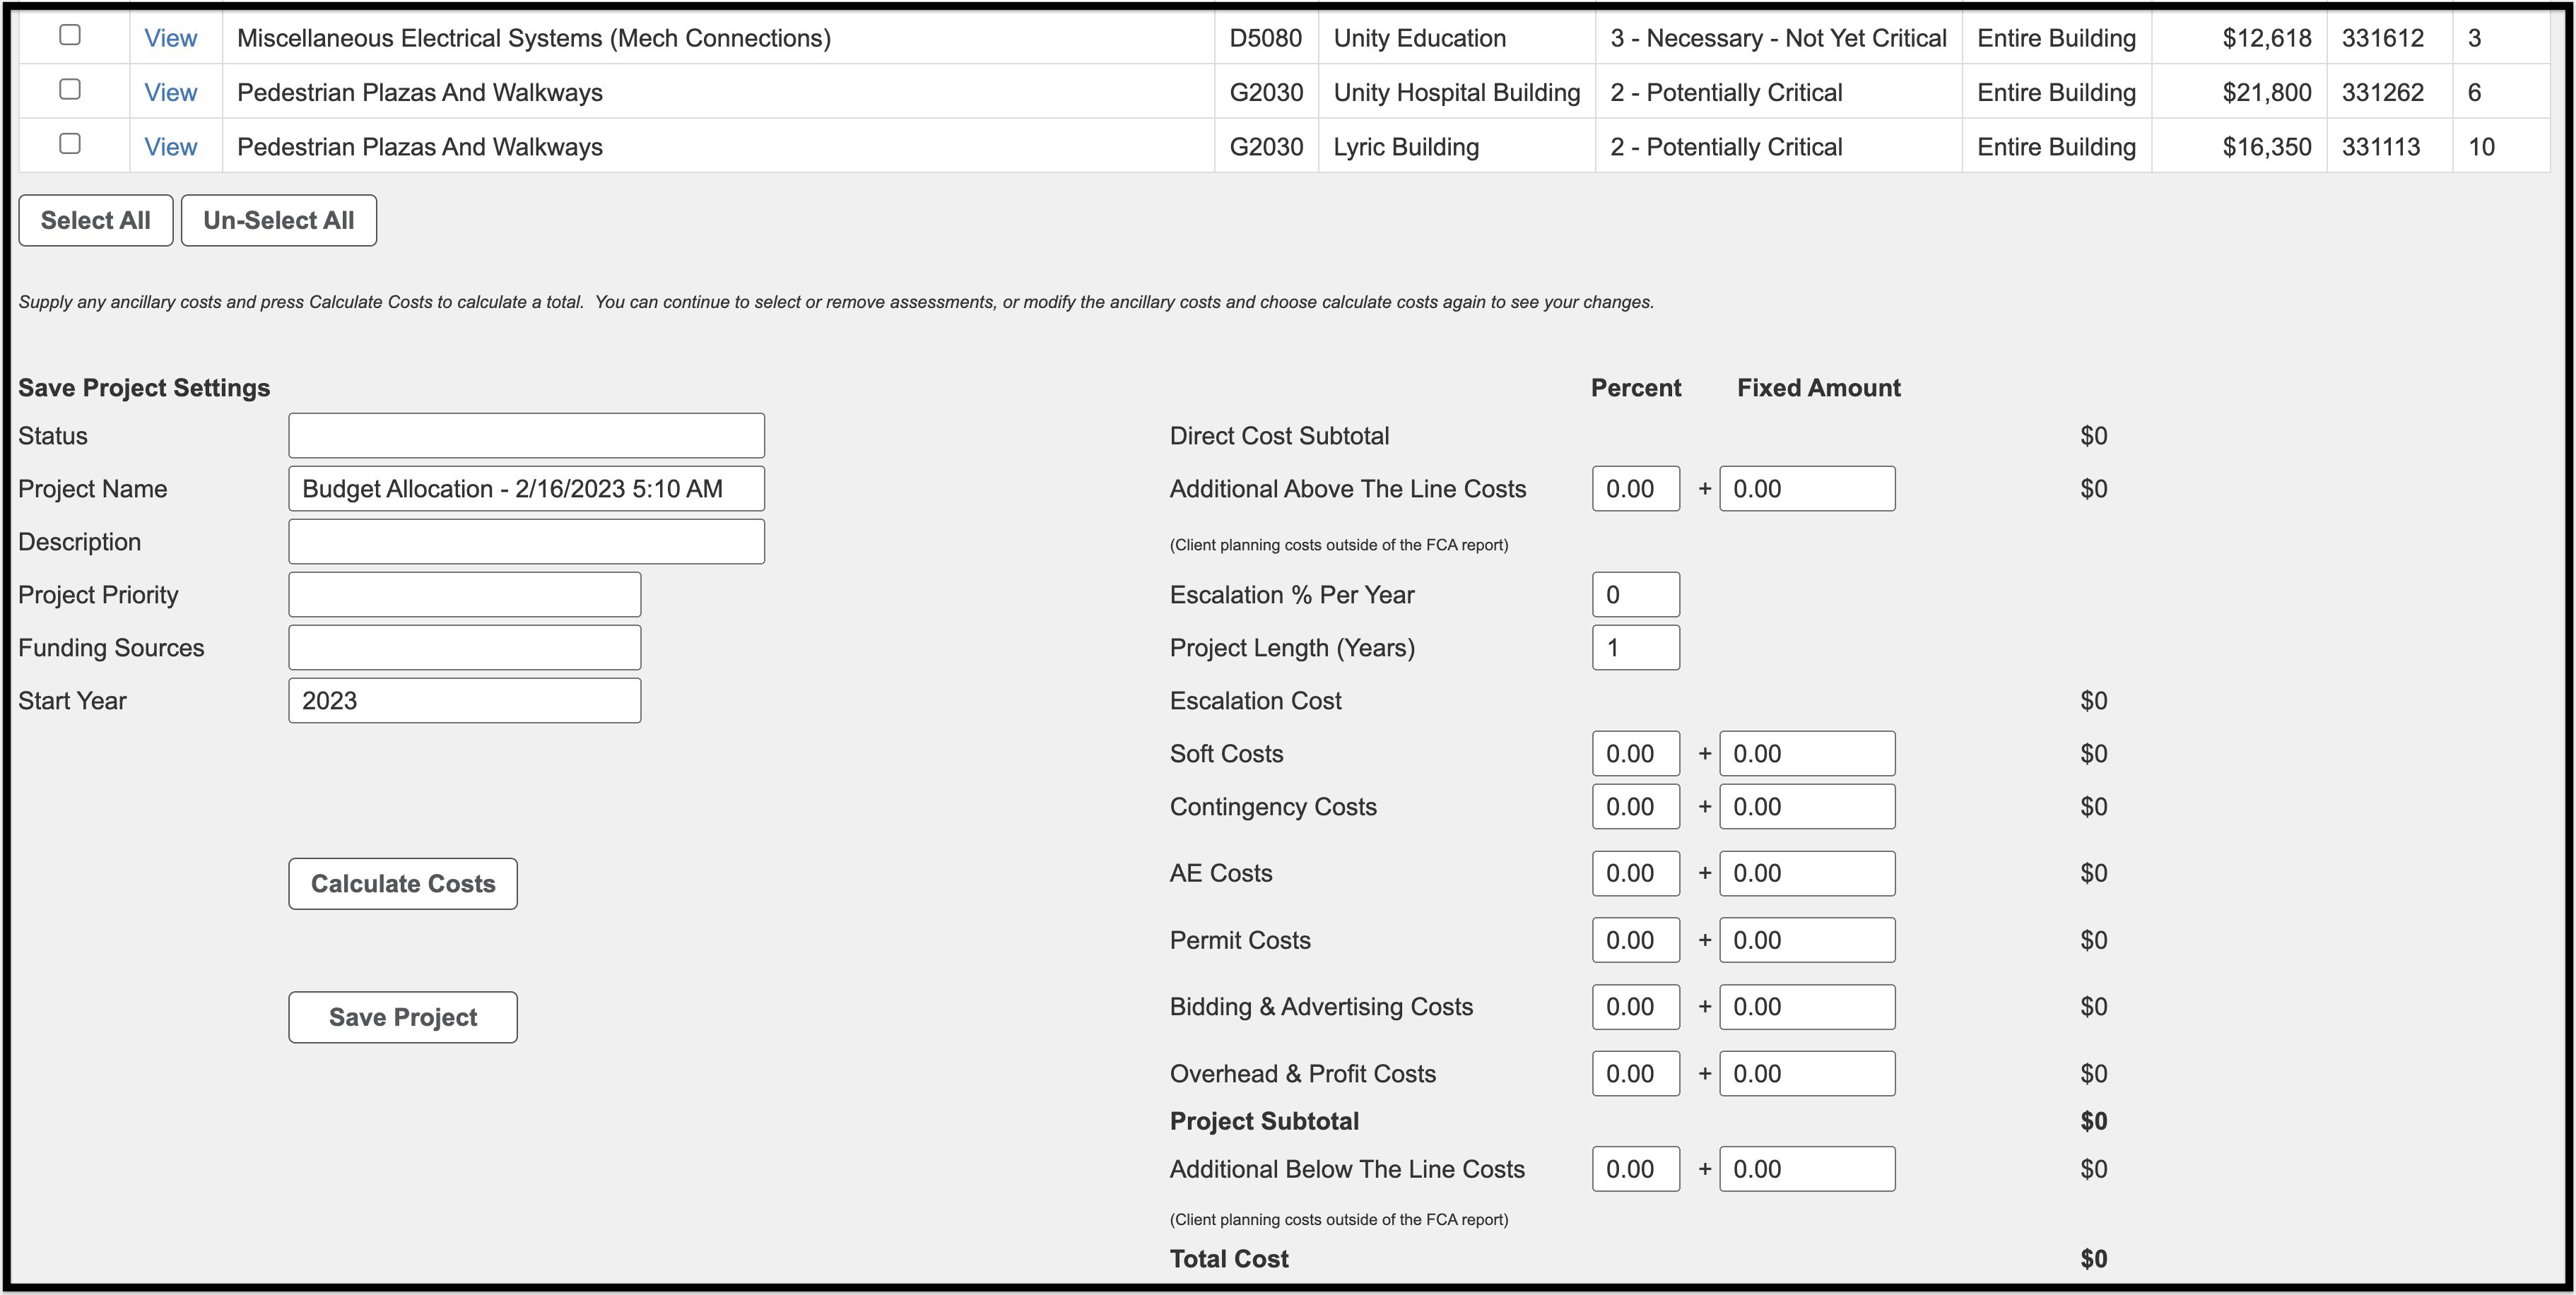
- Your budget allocation will now be transferred to the projects system
- Choose Select All or manually edit the list of items to be included in your budget
- Adjust below the line entries and text fields
- Click Save Project
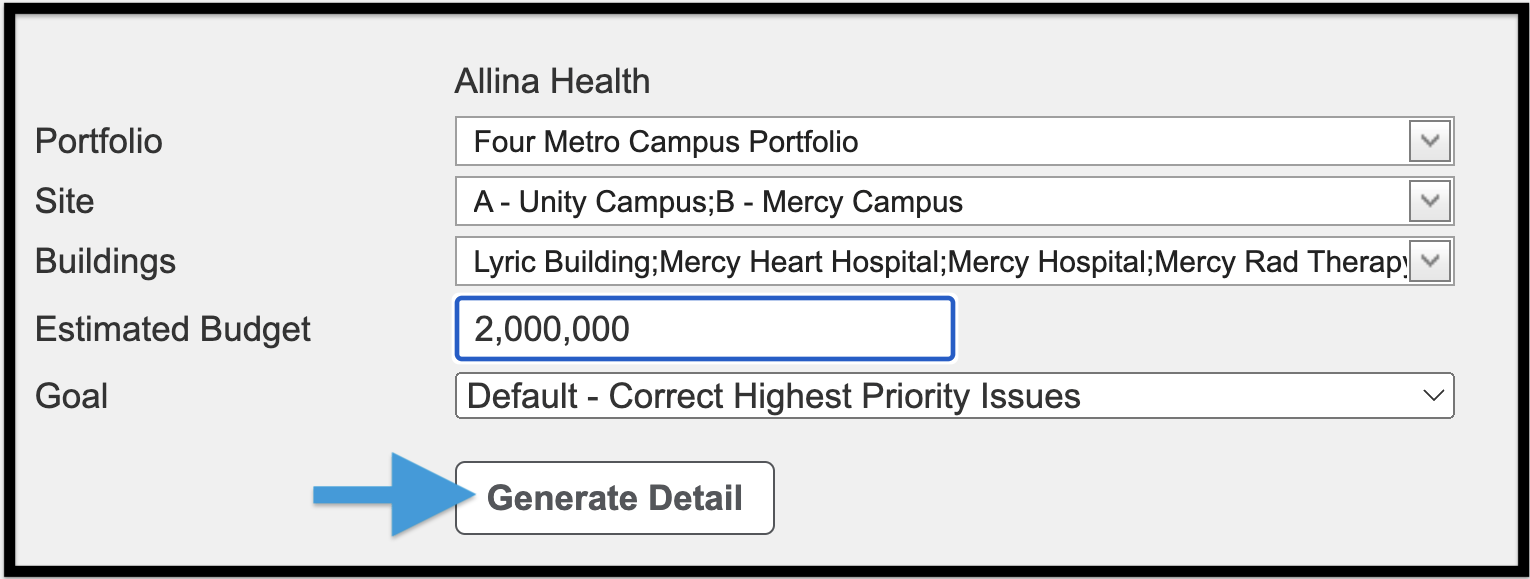
Create Budget Allocation #
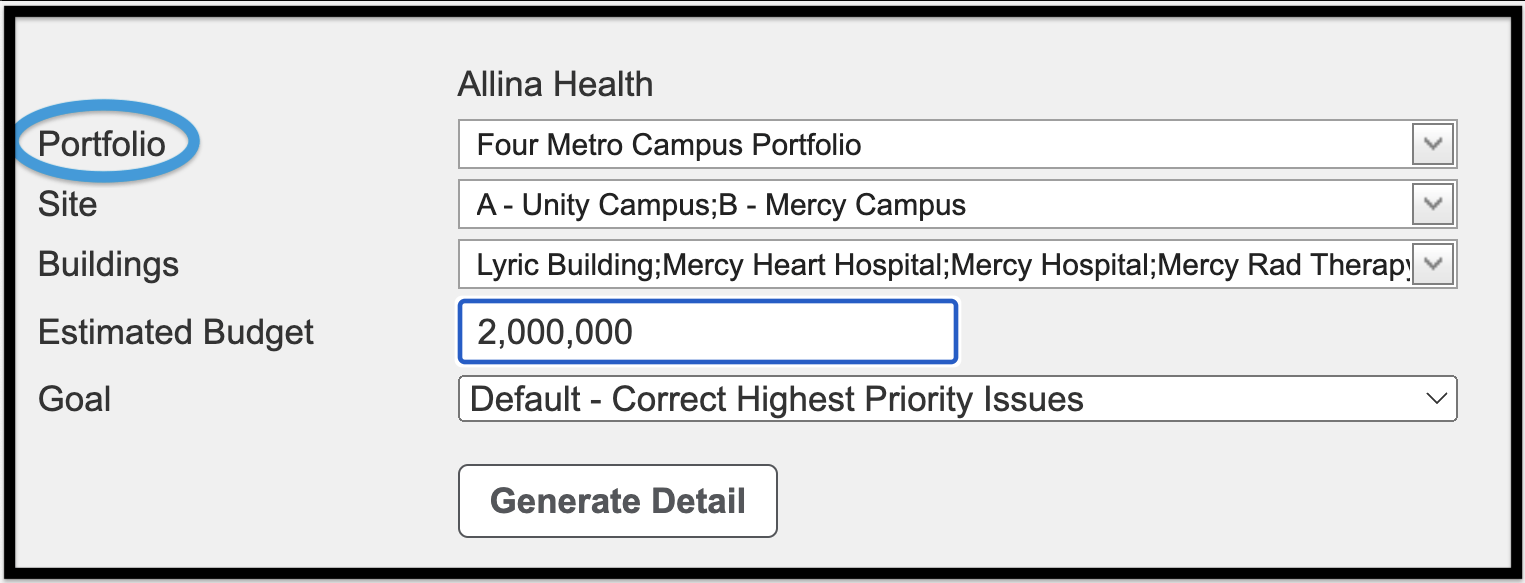
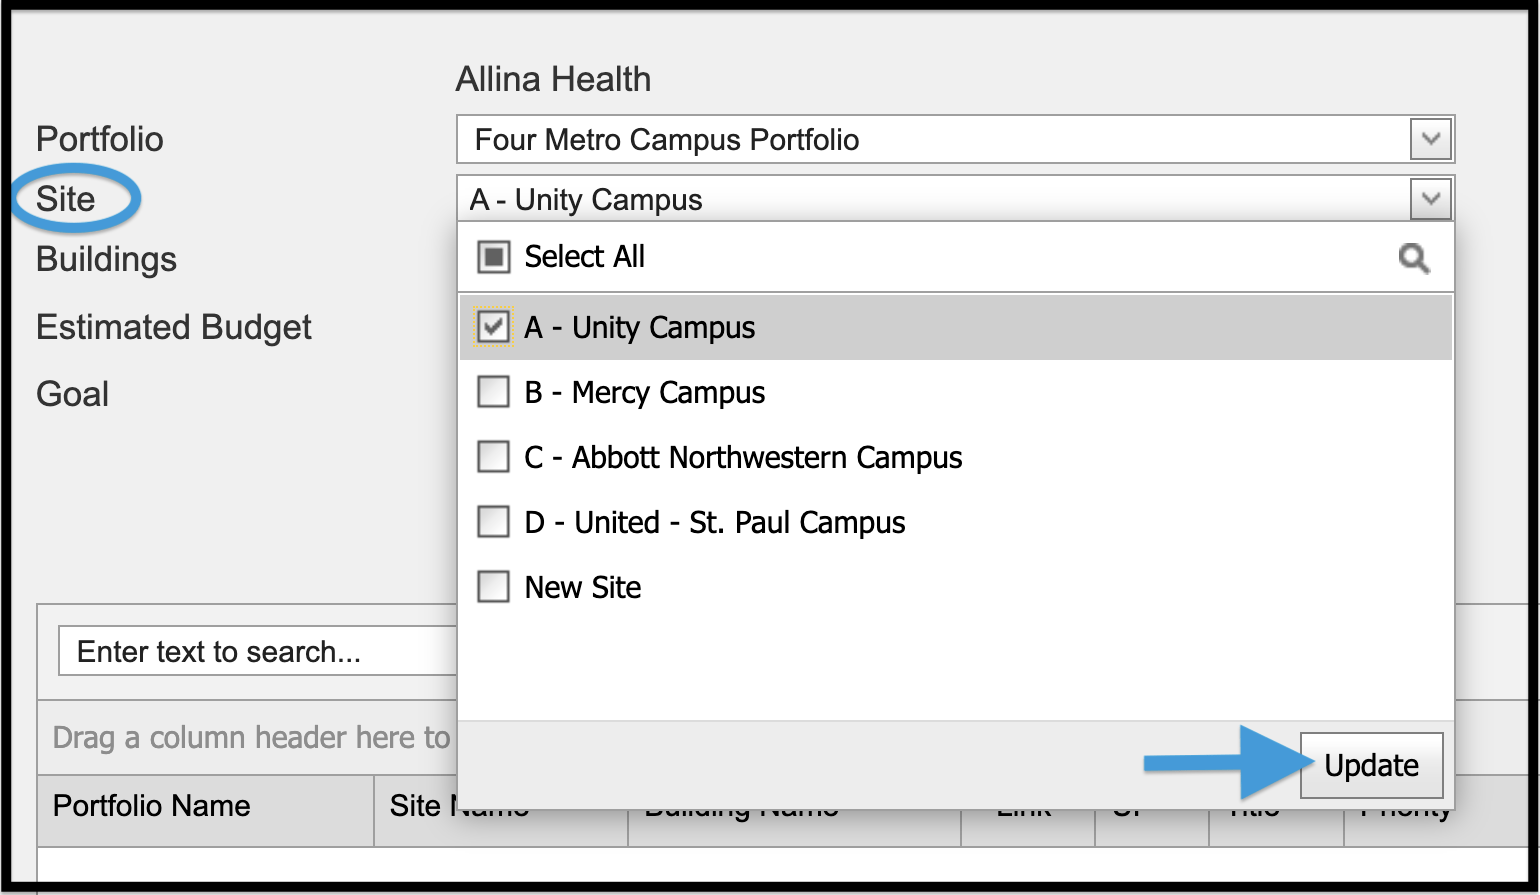
- Select Portfolio
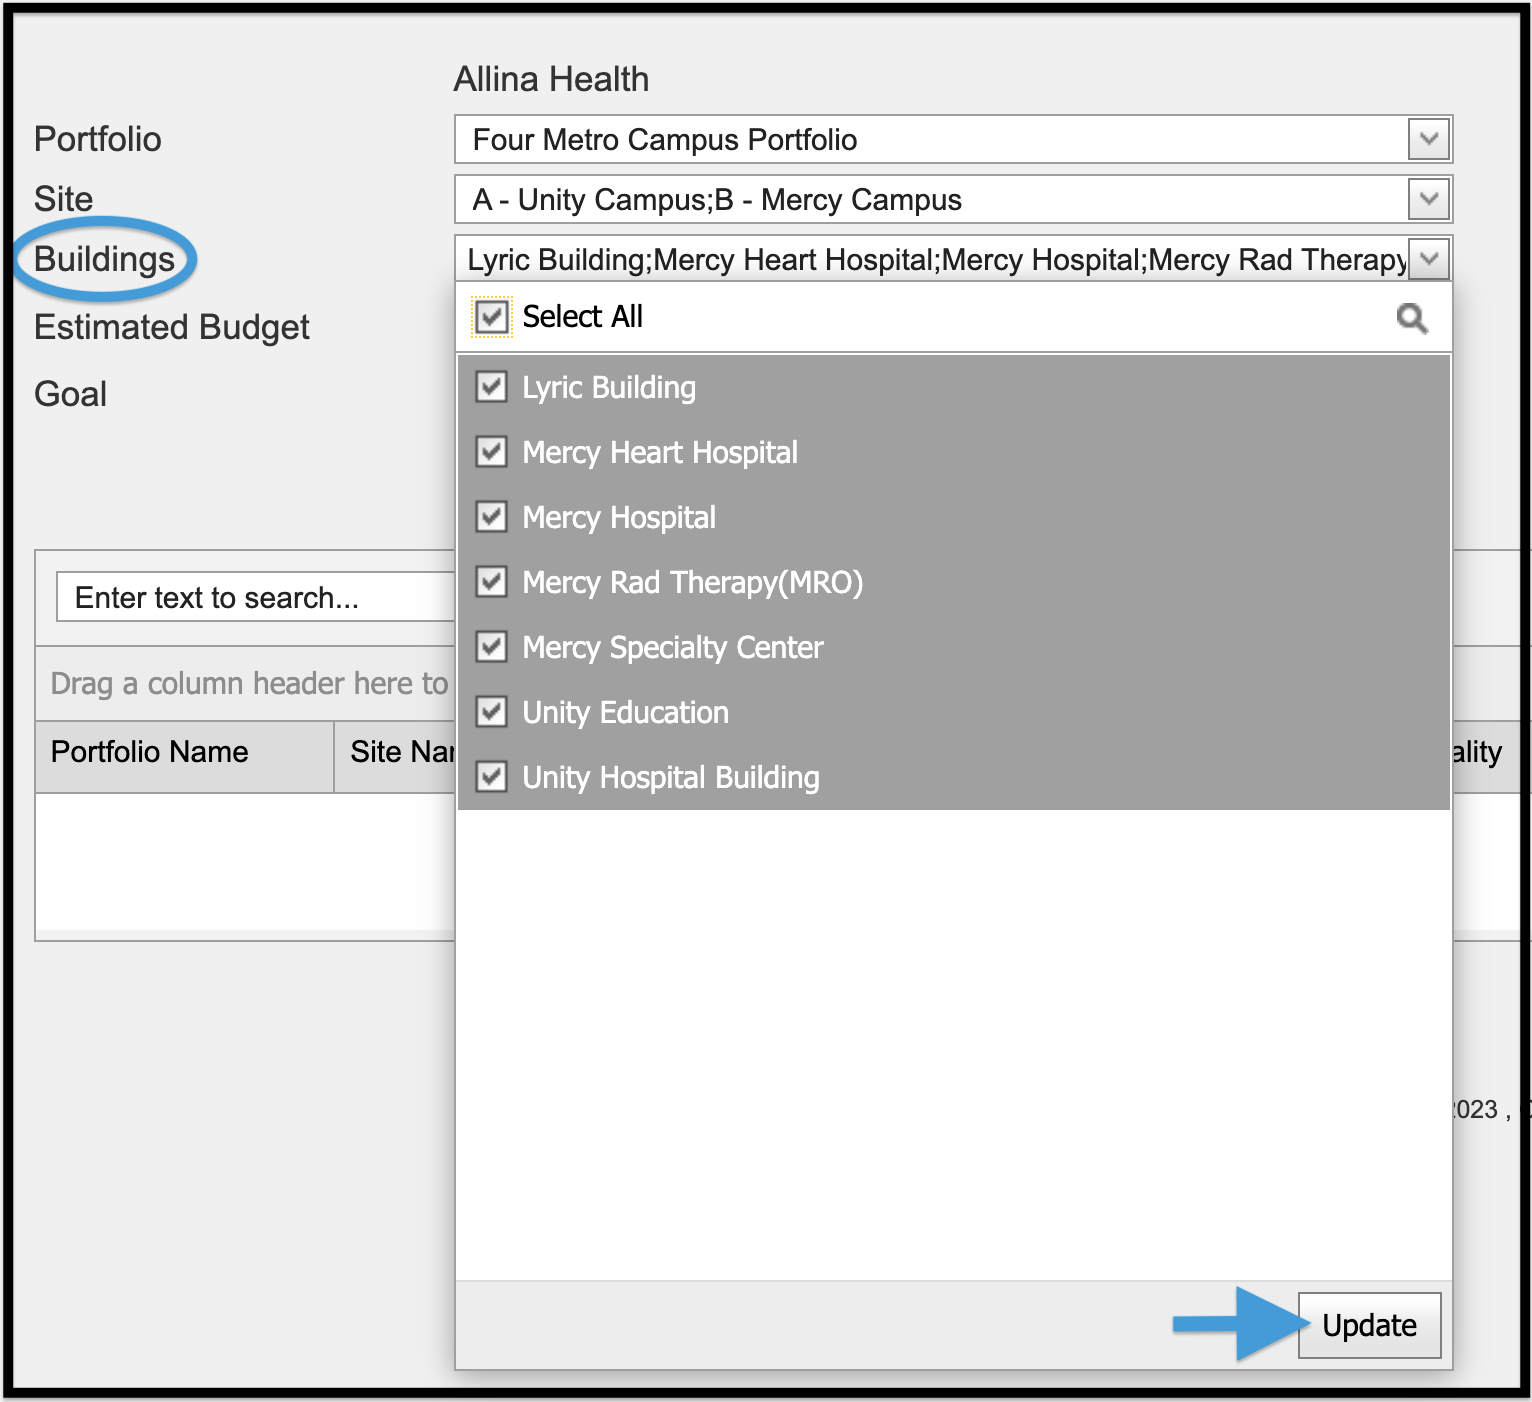
- Select Site(s)
- Select Building(s)
- Enter an estimated budget figure
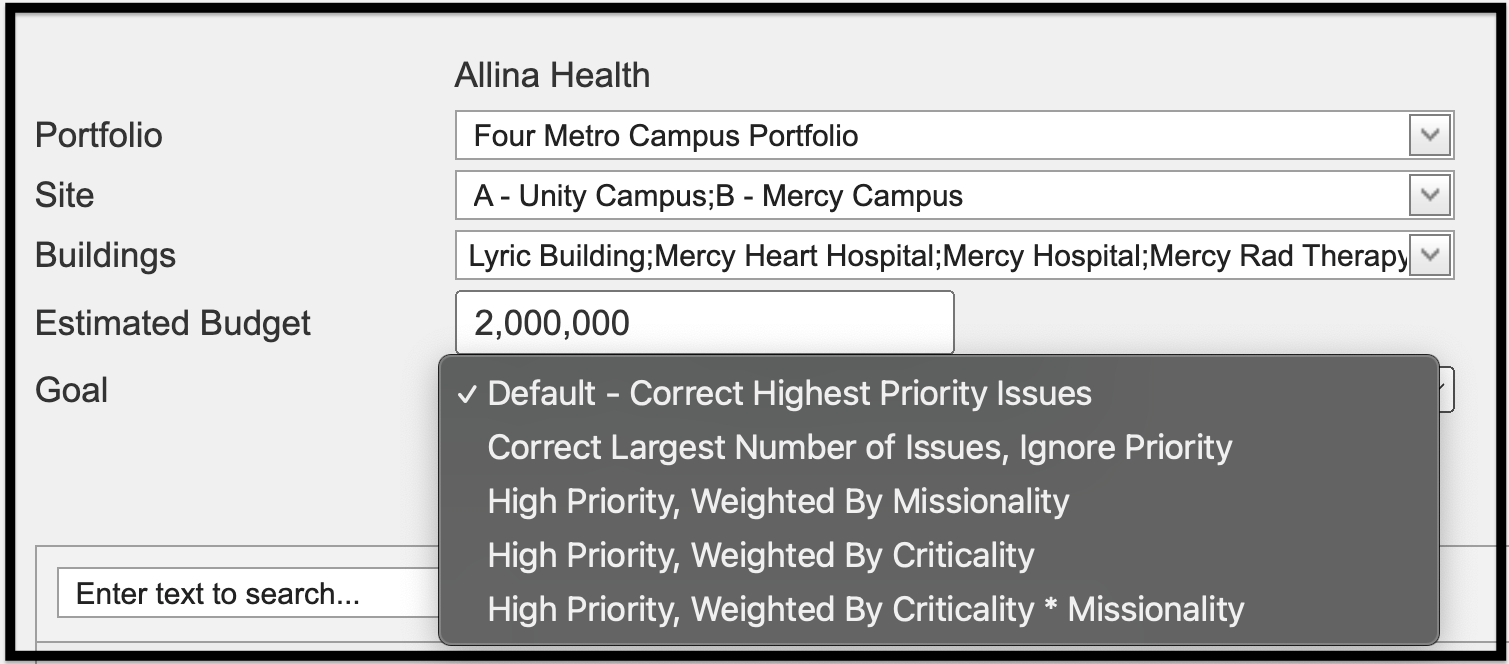
- Select allocation goal, based on priority, as noted below.
Select Desired Goal #
Default – Correct Highest Priority Issues #
In this allocation scenario, the software will prioritize your deficiencies in the following manner:
- Priority
- Observed Remaining Life (least years remaining)
- Risk of Failure
- Impact of Failure
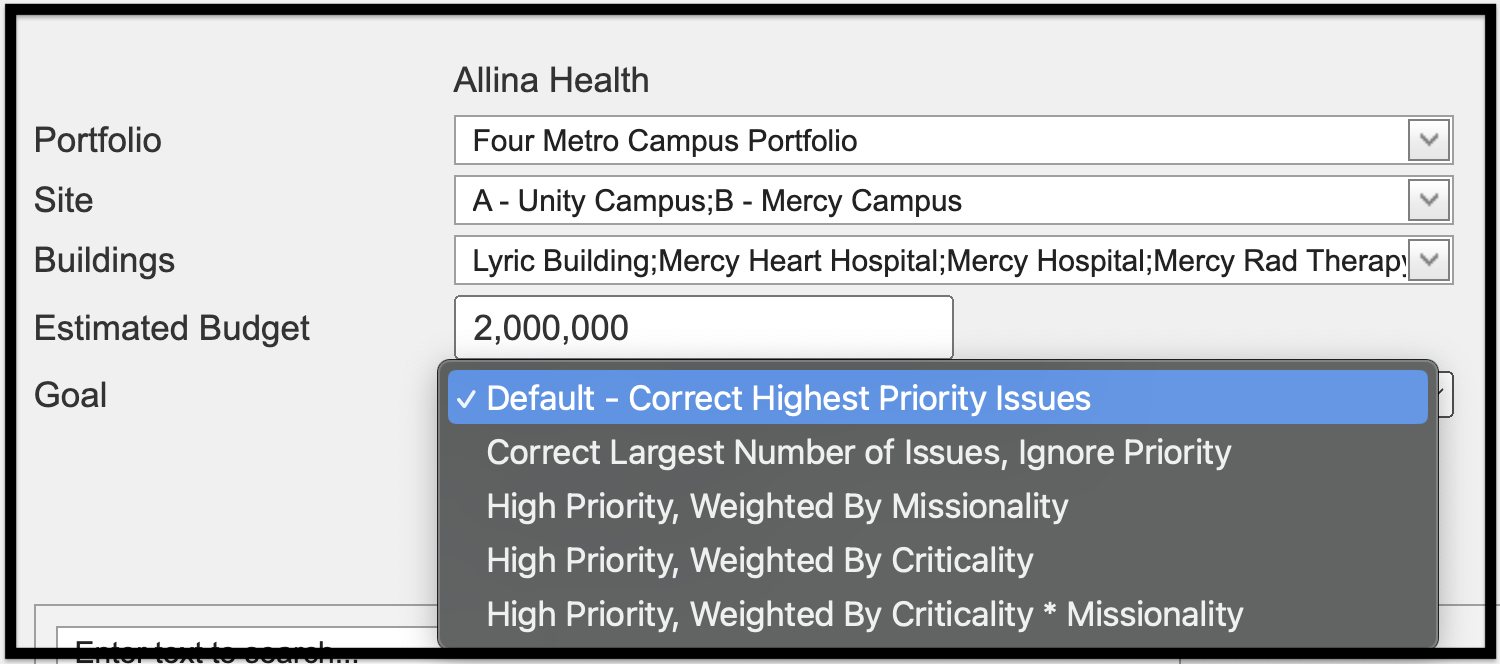
Correct Largest Number of Issues, Ignore Priority #
In this allocation scenario, the software will ignore priorities and will attempt to cure the largest number of deficiencies within your budget and, as such, will cure from the least to the most expensive.
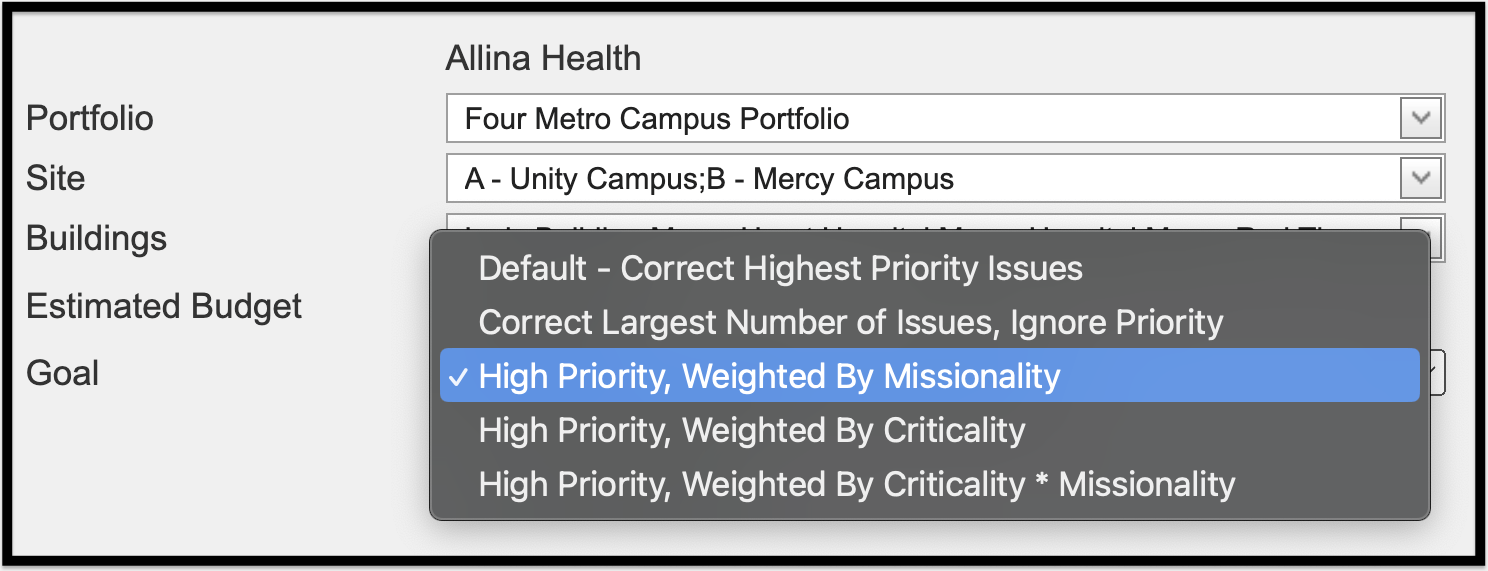
High Priority, Weighted by Missionality #
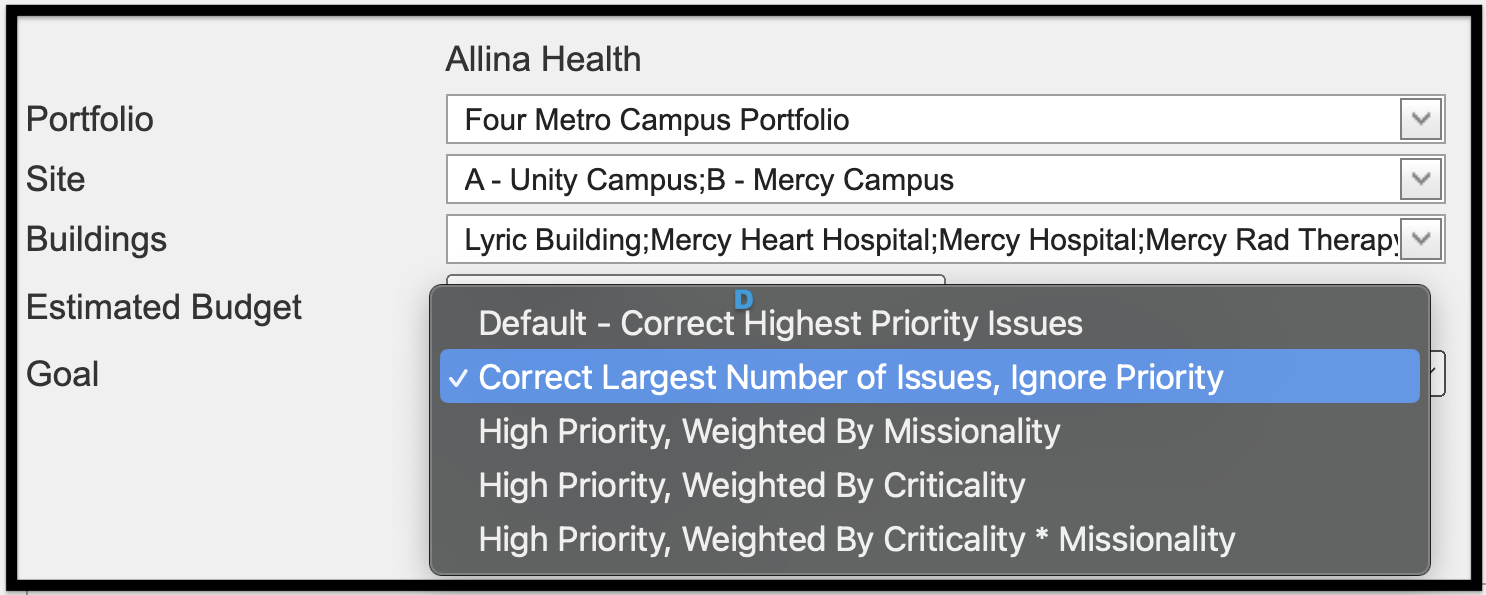
- Equal to (Priority * Missionality) to establish a weighted priority
- Observed Remaining Life (least years remaining)
- Risk of Failure
- Impact of Failure
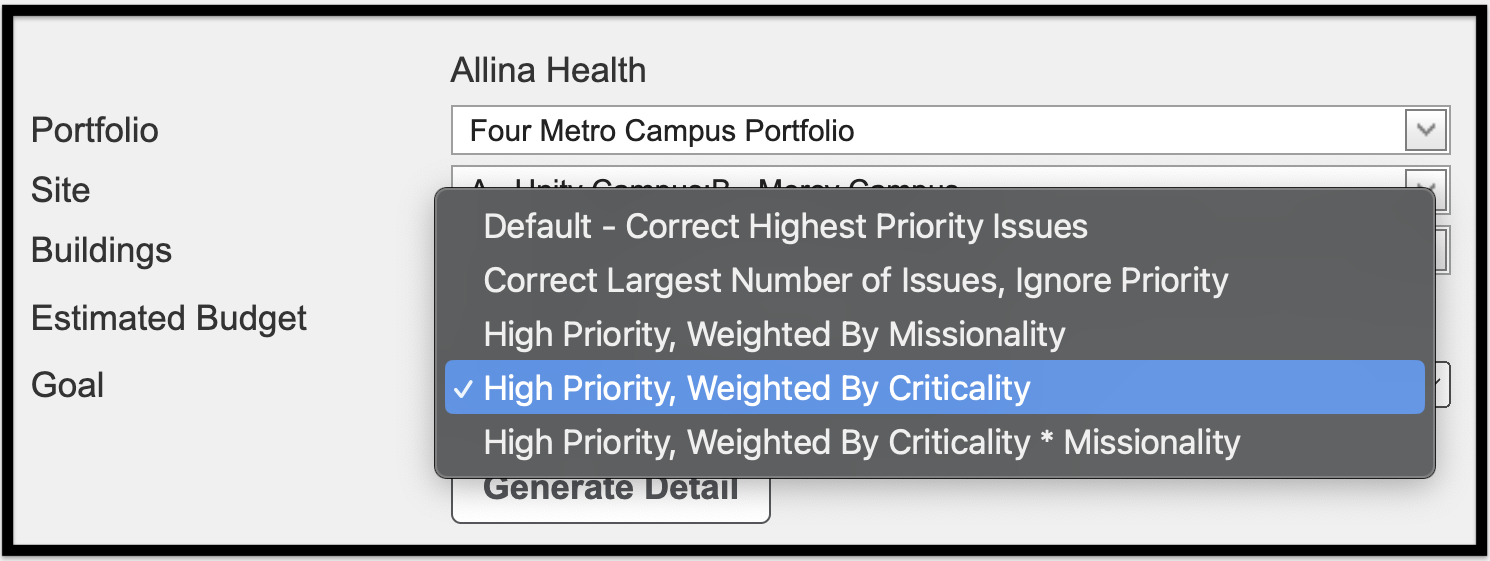
High Priority, Weighted by Criticality #
- Equal to (Priority * Criticality) to establish a weighted priority
- Observed Remaining Life (least years remaining)
- Risk of Failure
- Impact of Failure
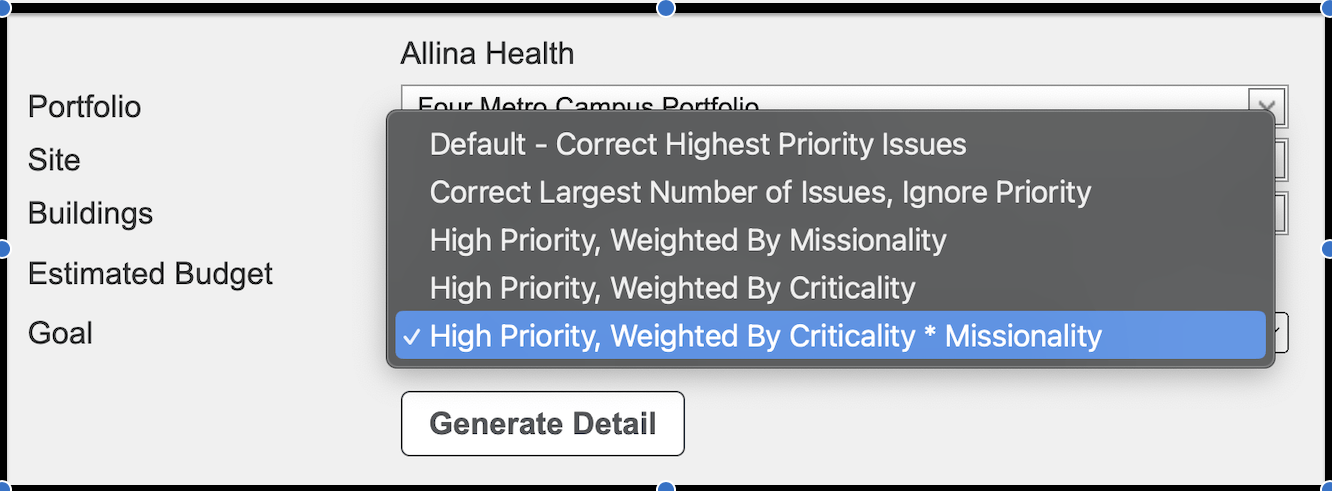
High Priority, Weighted by Missionality and Criticality #
- Equal to (Priority * Missionality * Criticality) to establish a weighted priority
- Observed Remaining Life (least years remaining)
- Risk of Failure
- Impact of Failure
Generate Detail #
Target FCI Tool #
This tool enables you to input a target asset Facility Condition Index (FCI) at 1-year, 5-year, and 10-year intervals and calculates the total needed to spend per asset to accomplish the Target FCI. After establishing the Target FCI the system allows you to extrapolate a 10-year budget based on your selections.
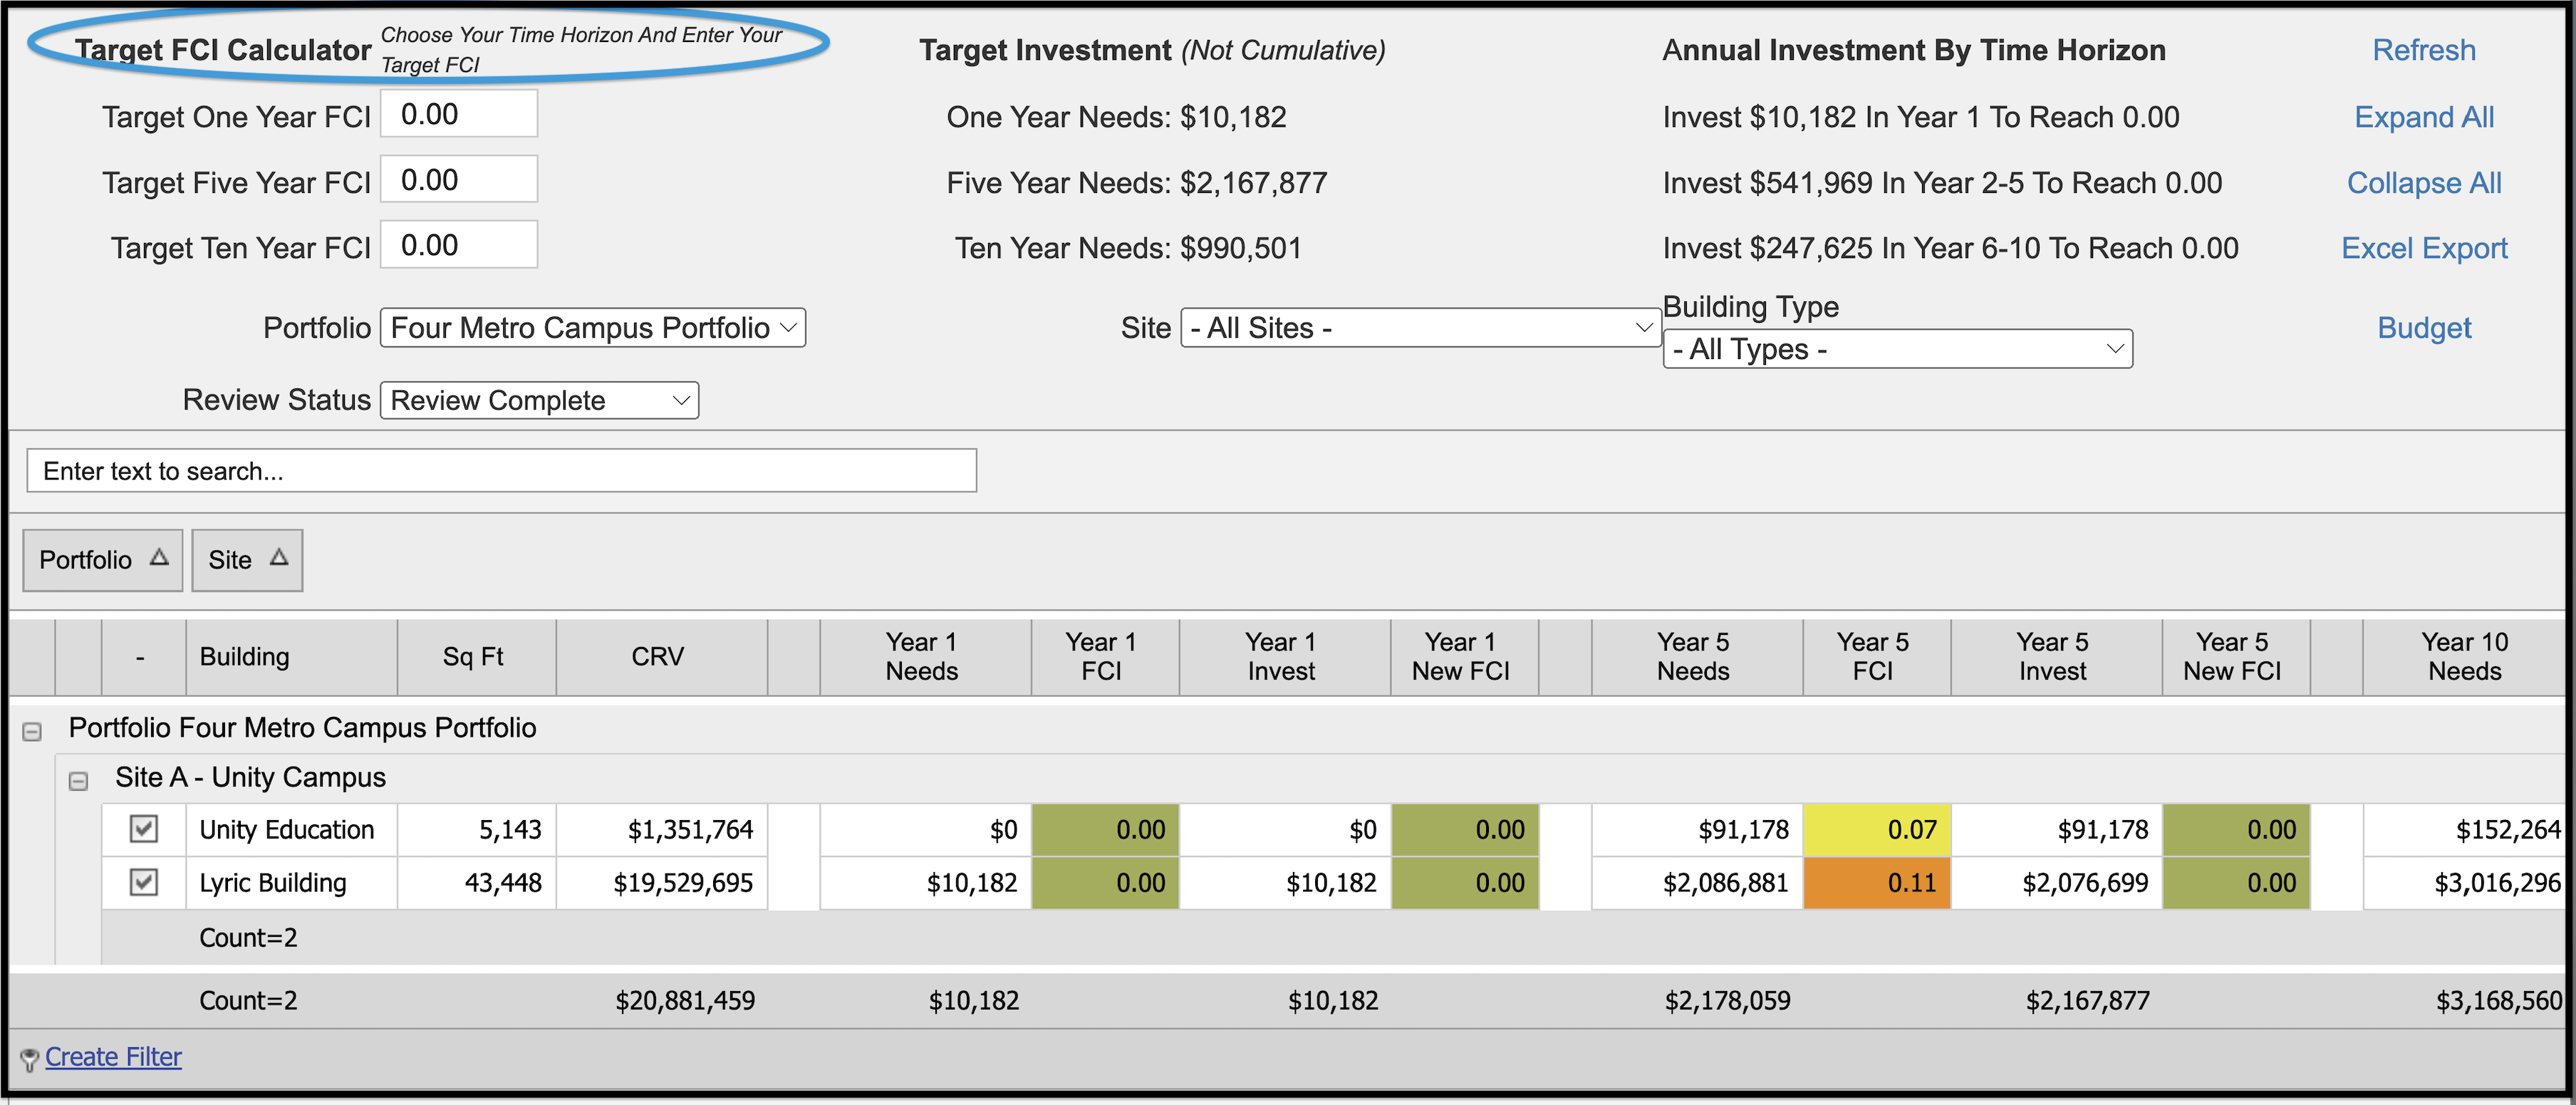
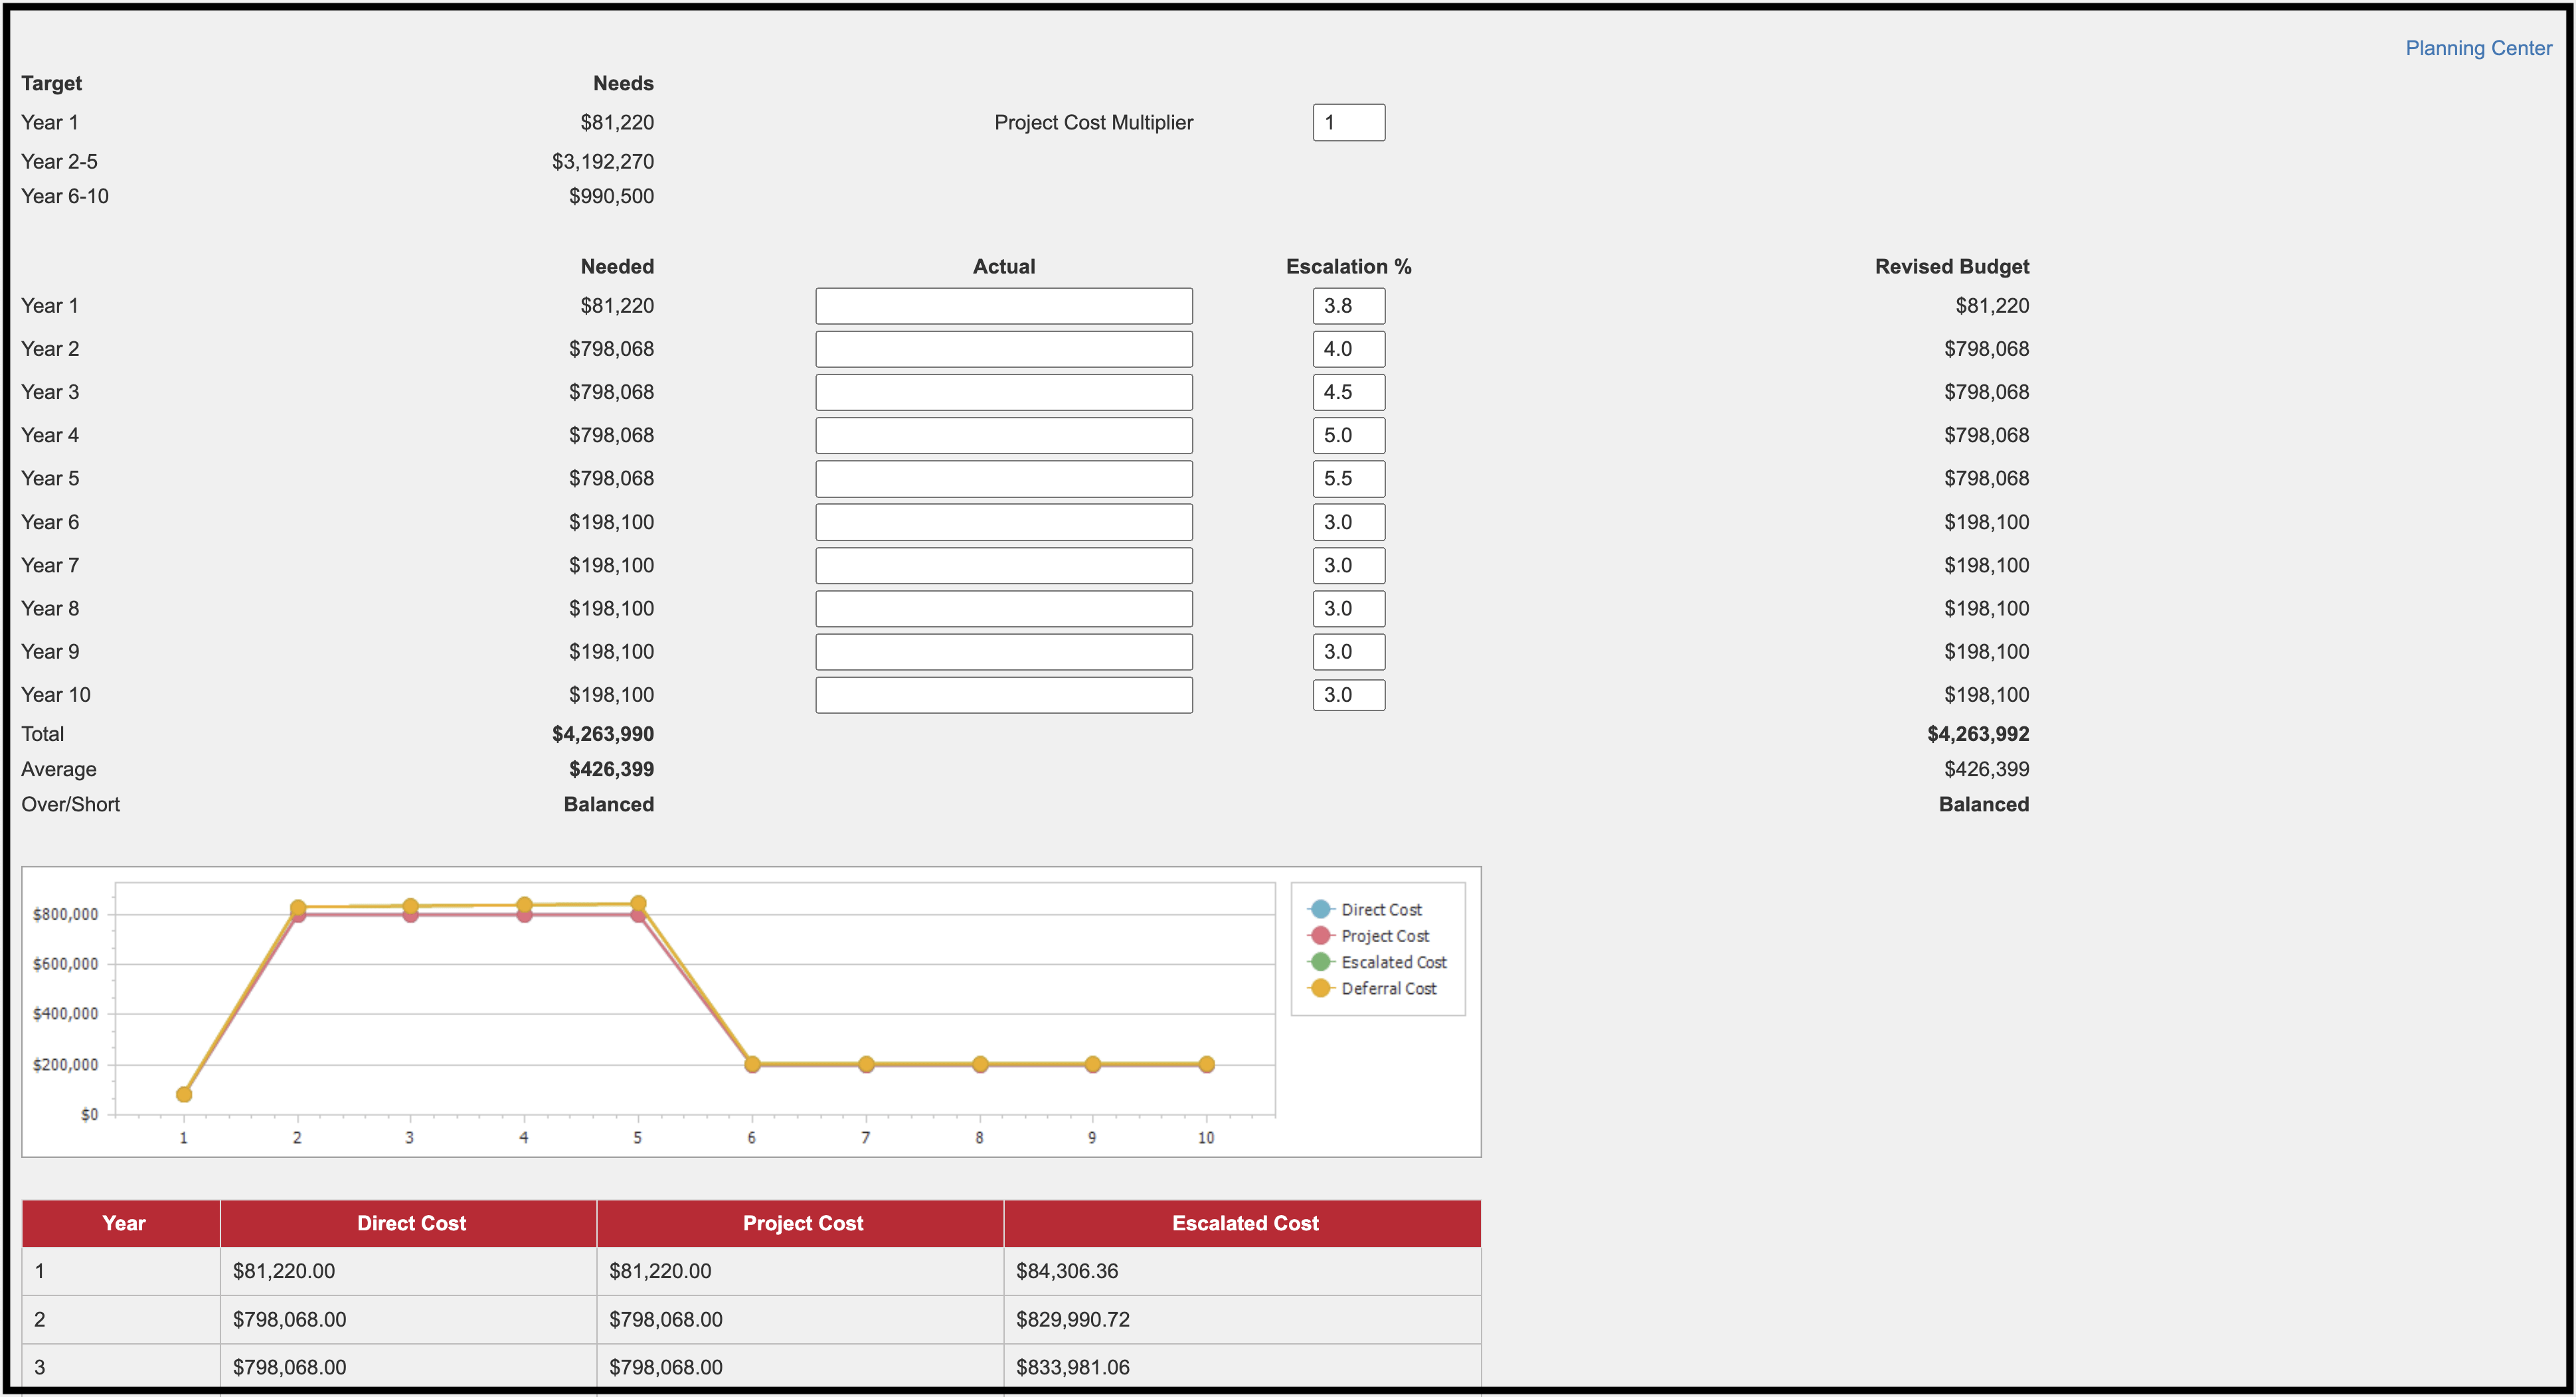
Click on the Budget link in the upper right to access the budget development tool.
Project Planning Tool #
The Project Planning Tool allows you to bundle desired Facility Condition Assessment items together to develop projects across all assets. This tool has numerous parameter and filtering capabilities that you can select including Portfolio, Site, Asset, Category, Uniformat, and Priority. This planning tool also can add percentage factors and fixed dollar amounts that apply to the overall Project Costs.
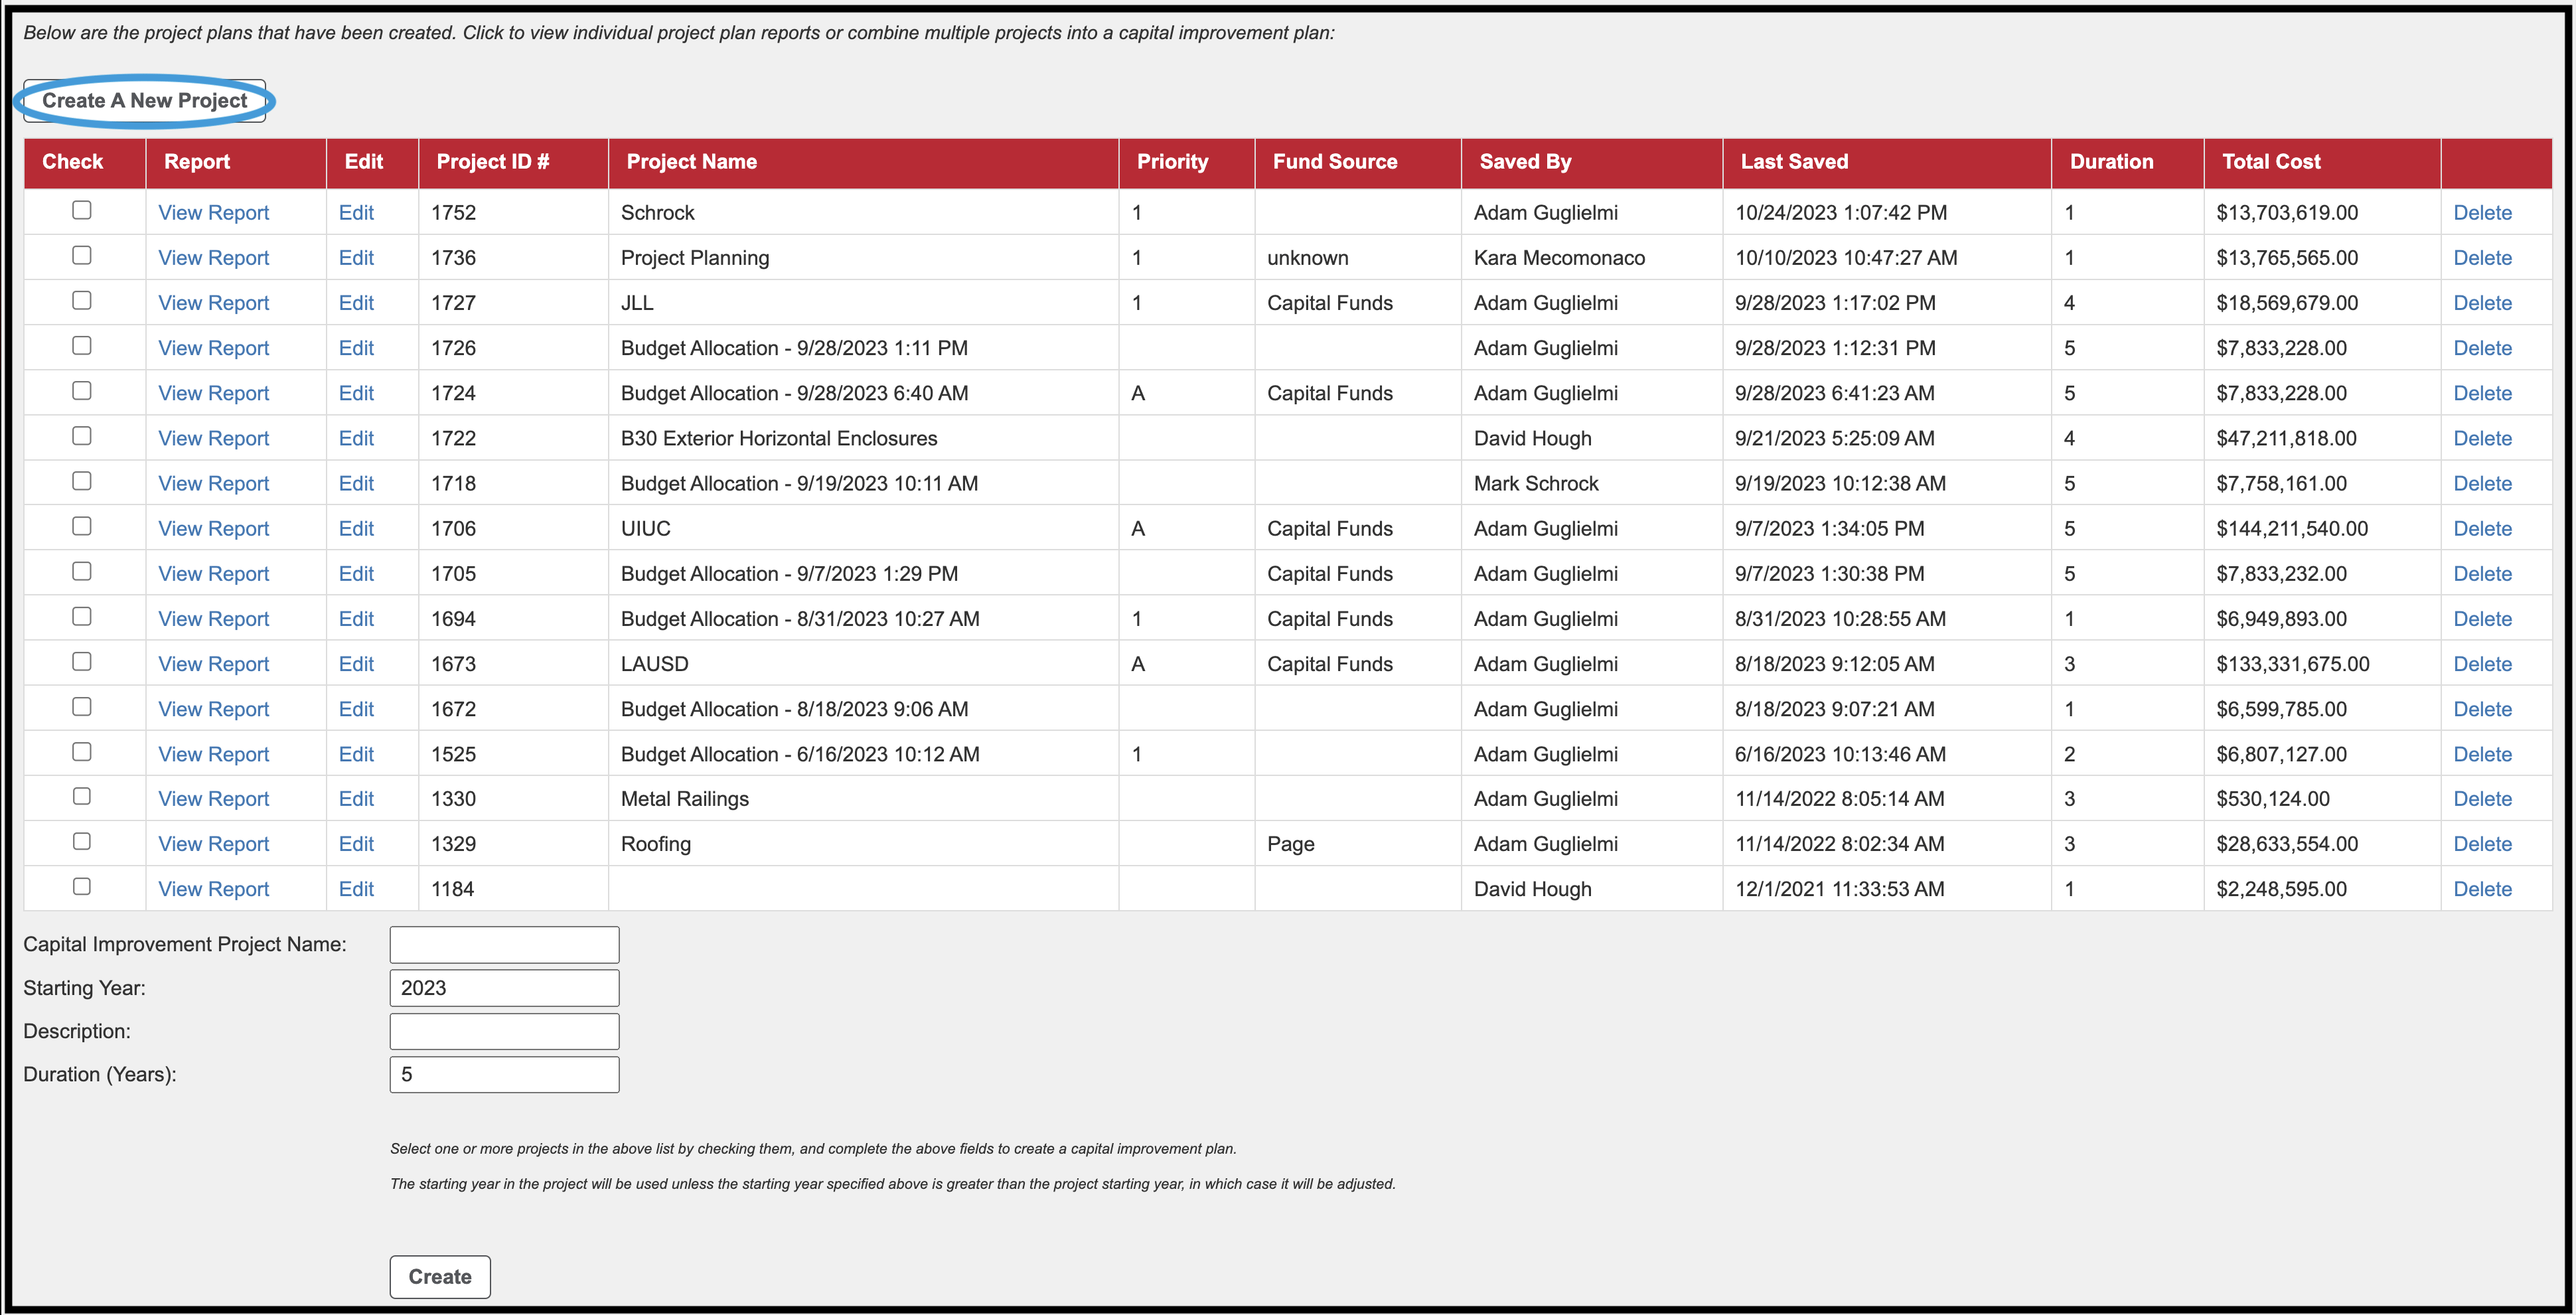
To create a new project:
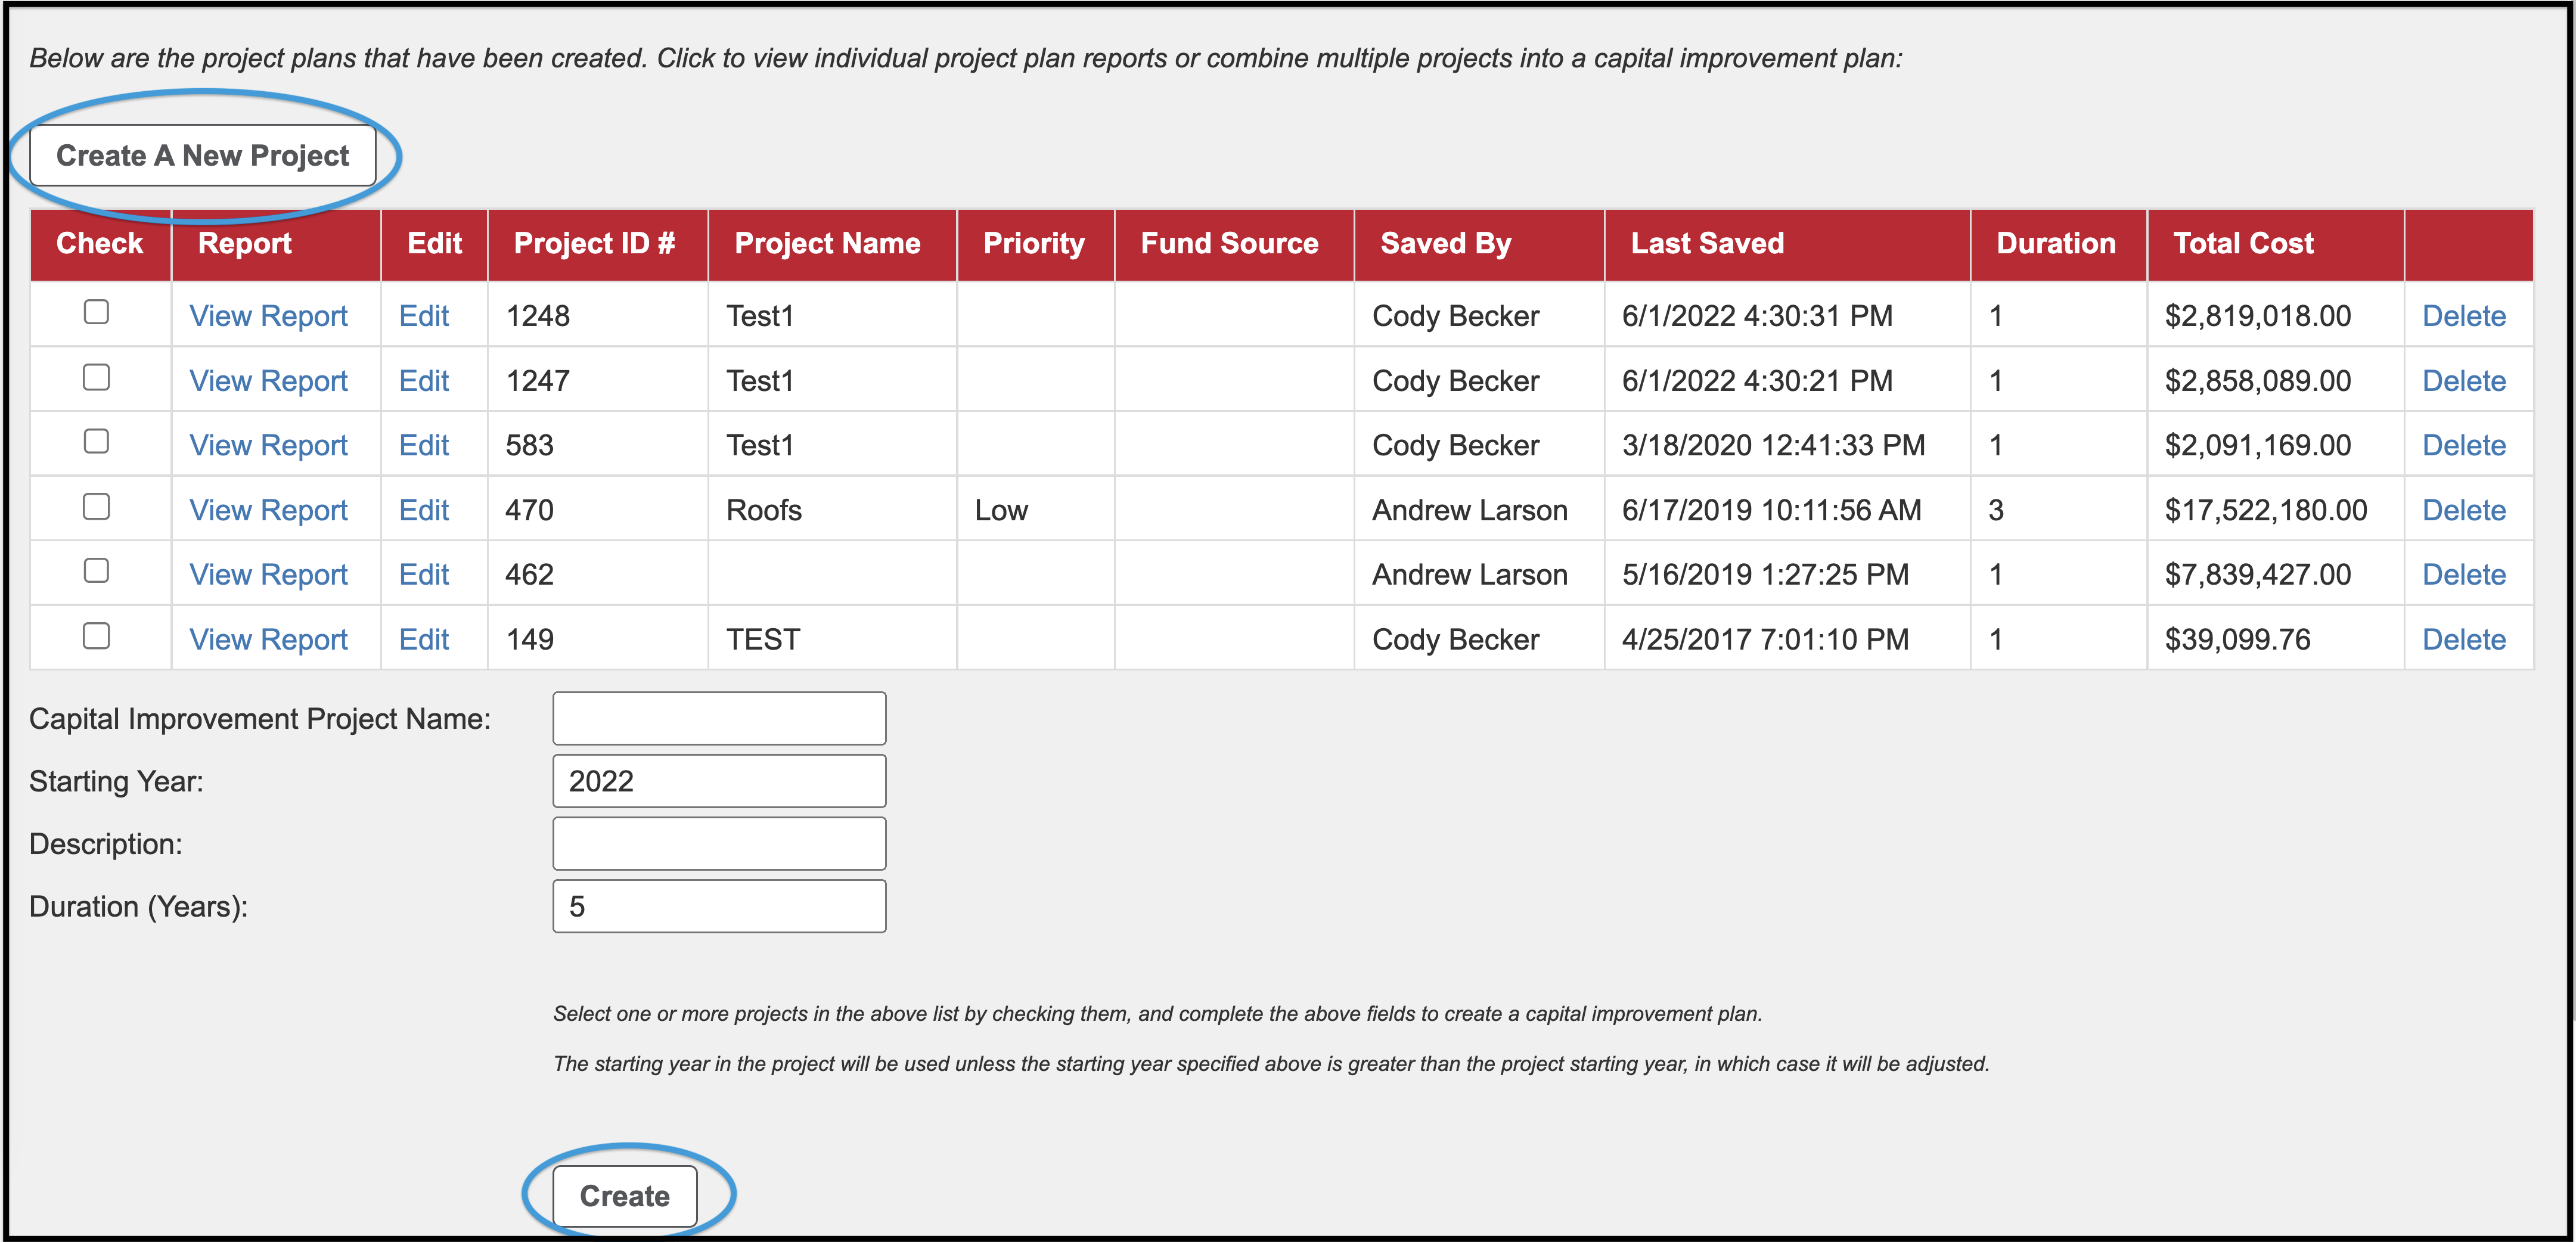
- Click Create a New Project
- You will then be prompted to select a Portfolio and confirm your selection.
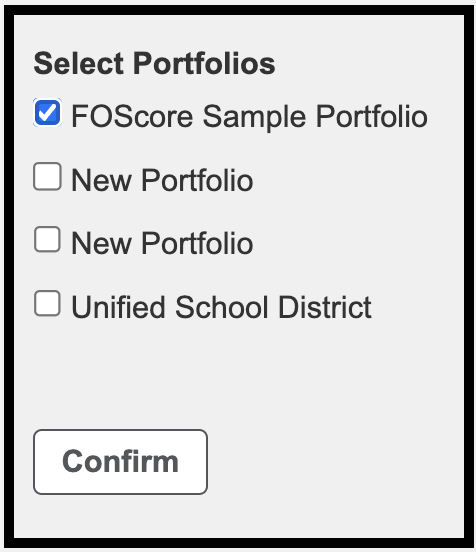
- You will then be prompted to select the Site(s) and confirm your selection.
- Click the Select All button to select all Sites.
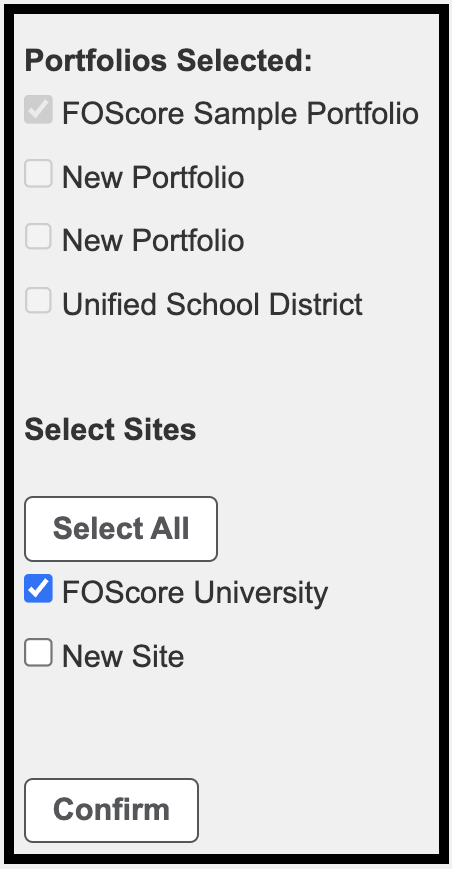
- You will then be prompted to select the Building(s) and confirm your selection.
- Click the Select All button to select all buildings.
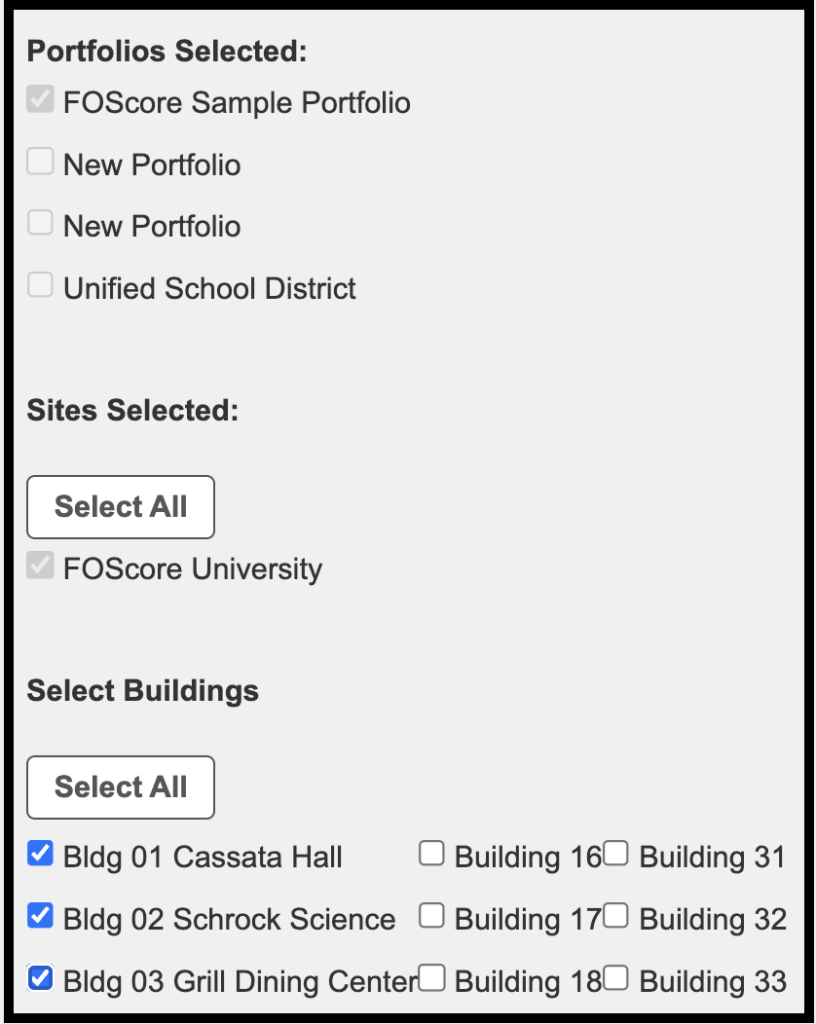
- You will then be prompted to select the systems, priorities, and categories, and confirm their selection.
- Click the Select All button to select all systems, priorities, and categories.
- By default, Priority 0 – No Action is not selected. If you’d like this category to be included in the project, click the checkbox to select it.

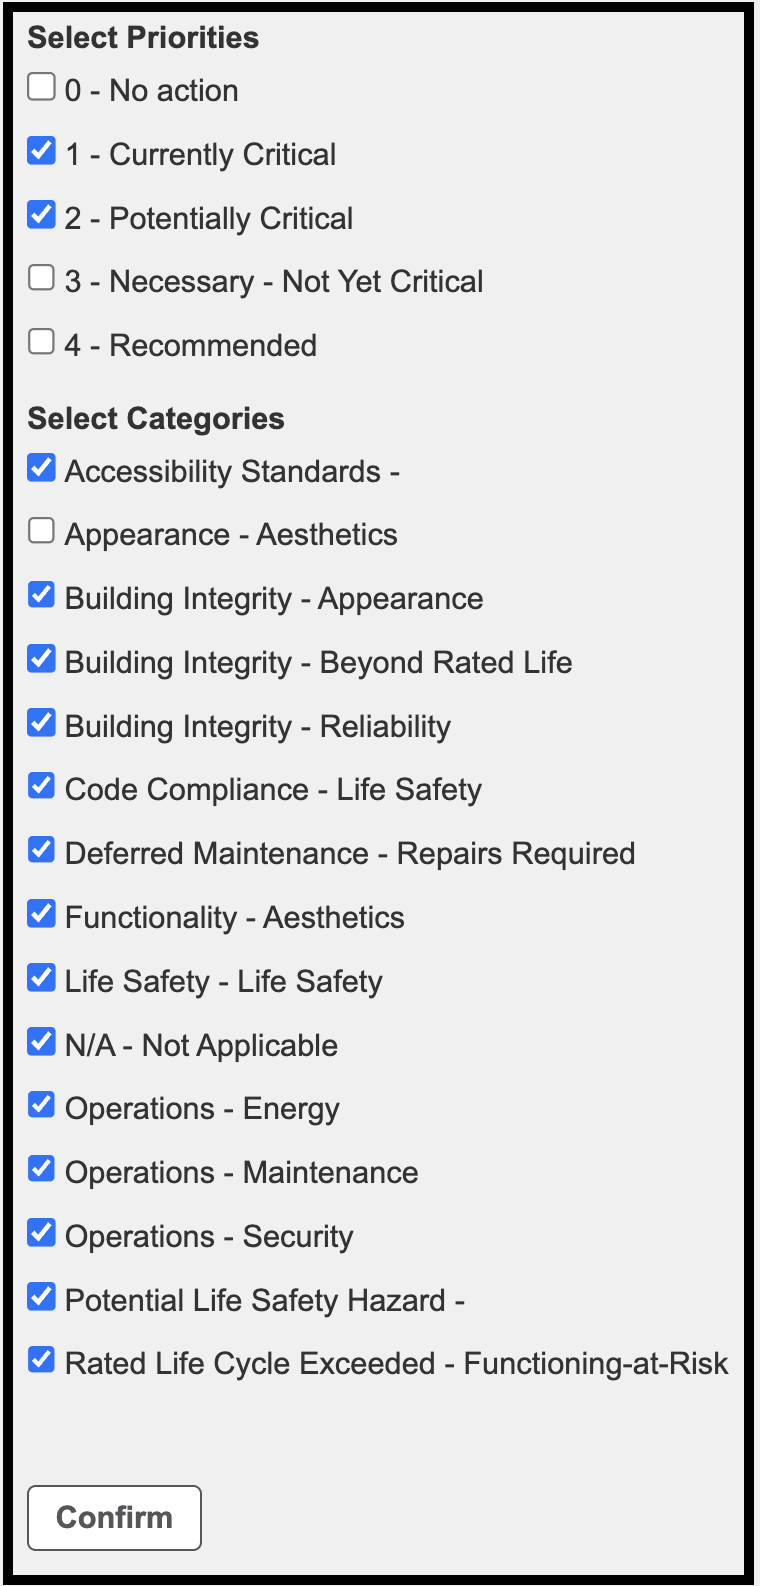
After selecting all of the relevant criteria to build your project:
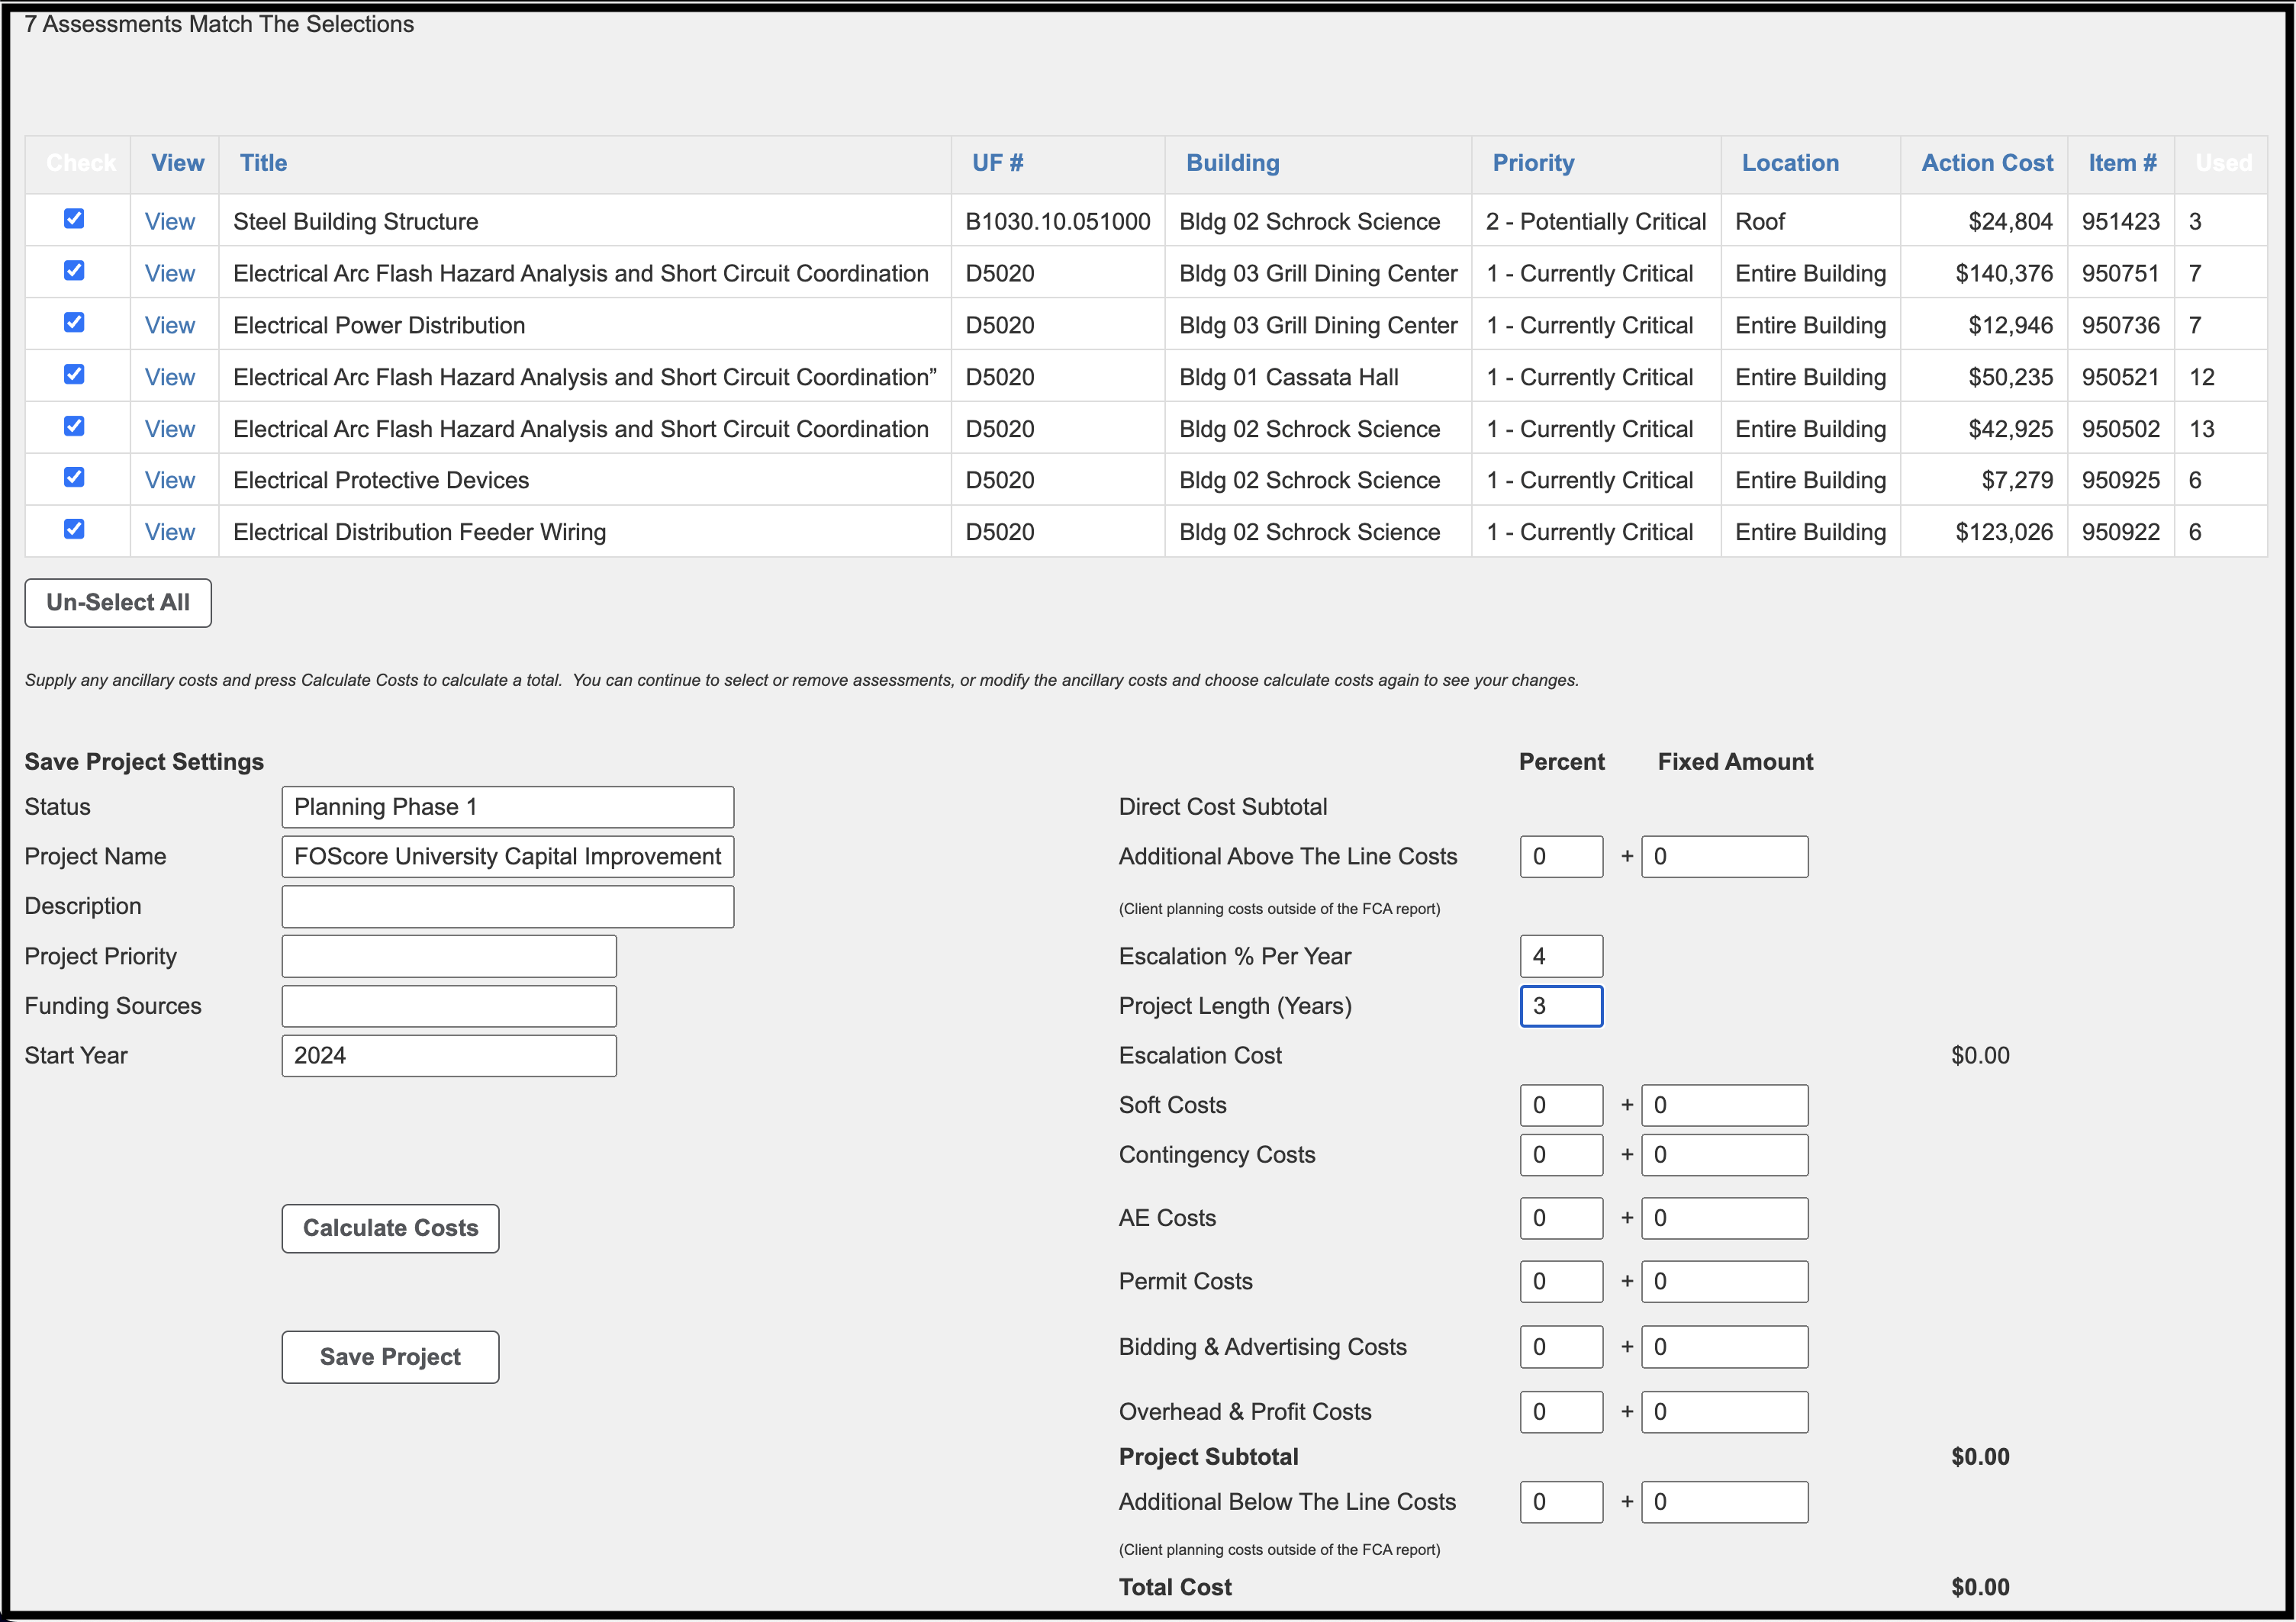
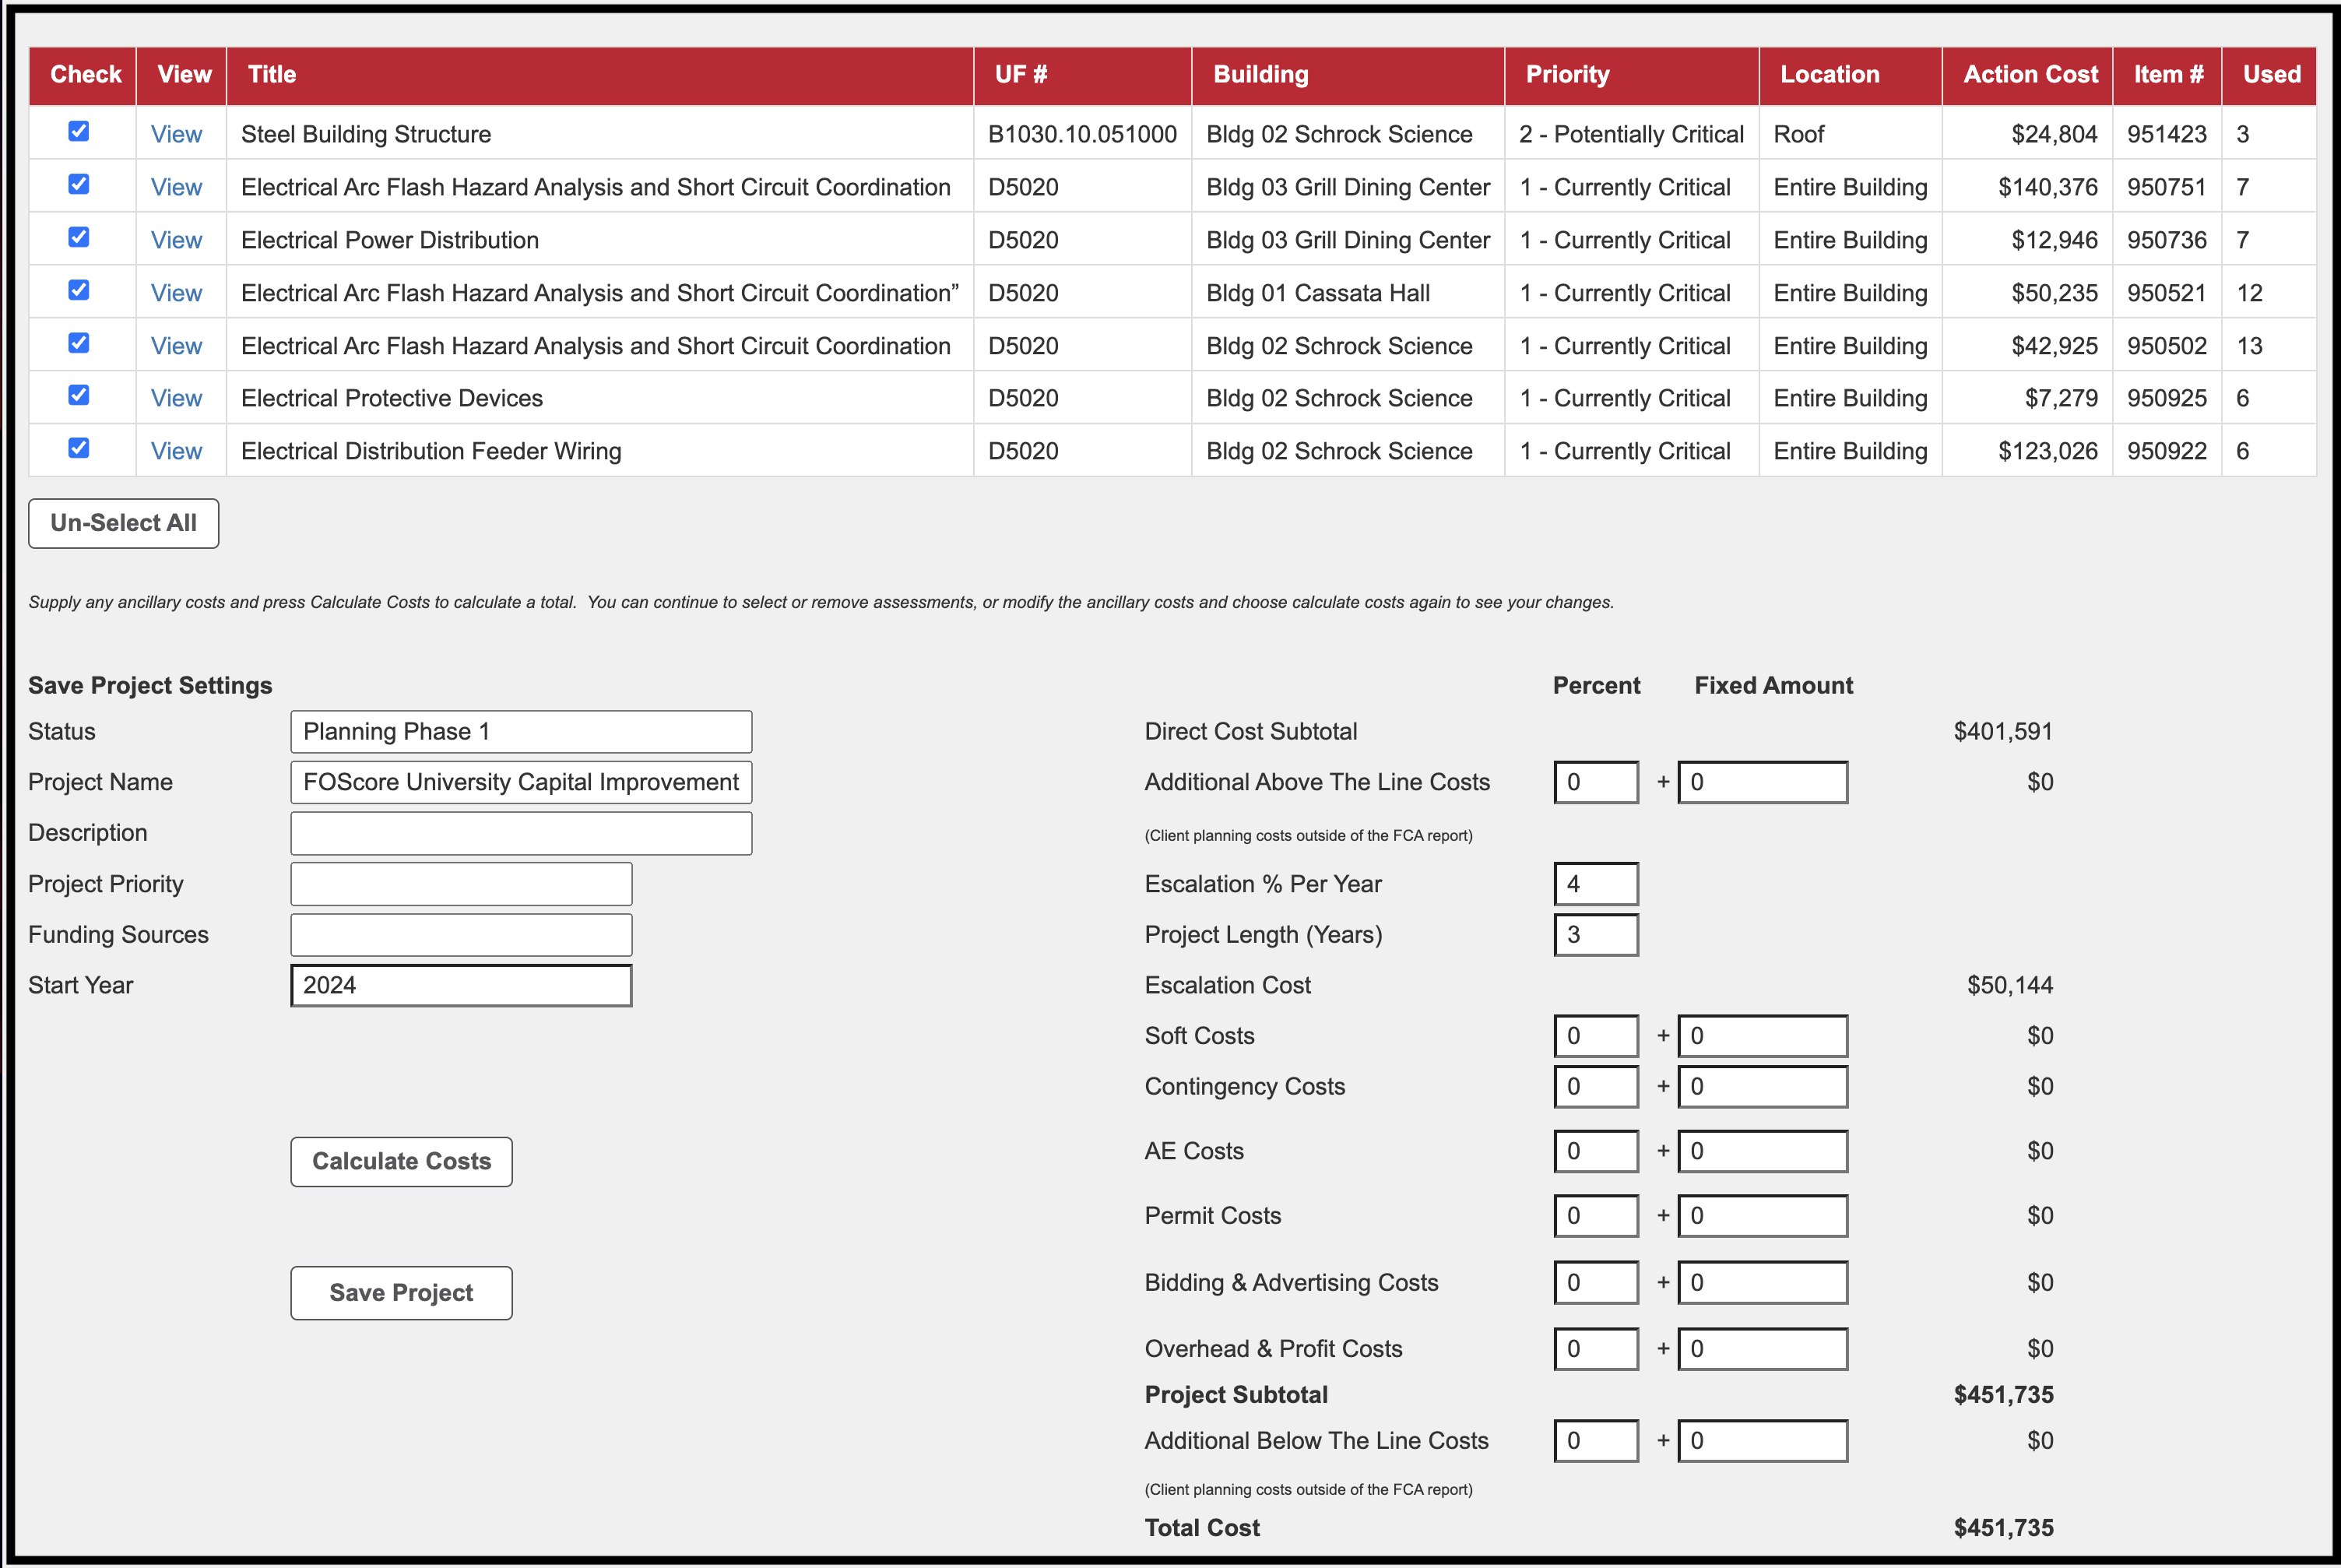
- All the assessments that match the above selections appear in a grid.
- The grid displays the following information:
- View
- Clicking on the View link will open the long assessment form. You are then able to see all the information for the item.
- Title
- UniFormat Number (UF#)
- Building
- Priority
- Location
- Action Cost
- Item #
- Used
- The Used column shows whether the assessment is used (or saved) to a different project, and how many times it has been used (or saved).
- View
- Click the check box to the far left of the assessment items that are to be included in the project.
- Click the Select All button to select all of the assessment items.
- To view the assessment before adding it, click the View link to the left of the assessment.
- At the bottom of the page, there is a Save Project Settings area.
Save Project Settings #
Pictured above on the left side of the screen, the Save Project Settings feature includes the following fields:
- Status: the status of the project, i.e., Pending, Complete, etc.
- Project Name: Designates a title for the project.
- Description: A narrative describing the scope of work.
- Project Priority: Displays the anticipated source of funds for the project i.e., Grant, State, etc.
- Start Year: The anticipated year the project is starting.
- Once all Project Settings are determined, click Save Project.
- To the right of the Save Project settings are the fields that represent overhead costs that can be applied to the project. These costs can be added as a percentage or as fixed costs. The item costs in the software are the direct costs. The fields are as follows:
- Additional Above the Line Costs: Additional items to be included in the project that are outside of the selected deficiencies.
- Escalation % Per Year: Increase in costs on an annual basis due to inflation or increased cost of living.
- Project Length (Years): The duration of the project.
- Soft Costs: Costs associated with financing and executing the work.
- Contingency Costs: The percentage of the fixed fee for unforeseen conditions/circumstances.
- AE Costs: Architecture and Engineering design fees.
- Permit Costs: Fees due to authorities having jurisdiction.
- Bidding and Advertising Costs: Fees associated with project solicitation.
- Additional Below the Line Costs: Costs related to furnishings, fixtures, and equipment that are typically provided by the owner outside of a construction project but need to be included before the building can be utilized for its intended purpose.
When all of the relevant information has been entered, click Calculate Costs.
- Values appear on the right side of the page.
- Percent and Fixed Amount values can be adjusted. Each time the values are adjusted, you must click Calculate Costs to update the Total Cost.
- To save the project, click Save Project.
- You will then be redirected to the Planning Module.
- The project will appear in the list.
- To edit the project, click Edit link.
- The Edit page is identical to the Add page.
- If a user edits the project, the project will be saved as a new project. The original project will be maintained.
- To delete any unneeded/unwanted project, click Delete.
- To view the report for the project, click View Report.
- To report opens as a PDF in a new window. You can download or print the report using the buttons on the top right of the screen.
- Below the project list is an area to create a Capital Improvement Plan (CIP) with one project, or by combing projects.
- Click the checkbox to the left of each project that will become part of the CIP.
- Enter information for the following fields:
- Capital Improvement Project Name
- Starting Year
- Description: A narrative describing the scope of work.
- Duration (Years)
- Click Create when complete.
- The report will automatically open as a PDF in the current window.
- Click the back arrow to return to the previous page.
- You can download or print the CIP using the buttons on the top right of the screen.
Budgeting Tool #
The Budgeting Tool is similar to the Planning Tool in that it allows users to create projects from the Facility Condition Assessment items. This tool is intended to guide users through numerous parameters and filtering capabilities with displayed cost amounts, the first of which is Action Timeframe. Users can drill down to select from desired Portfolios, Sites, Assets, Categories, UniFormat numbers, and Priorities. Within this tool, users also can add percentage factors and fixed dollar amounts that apply to the overall Project Costs.
To create a Budget:
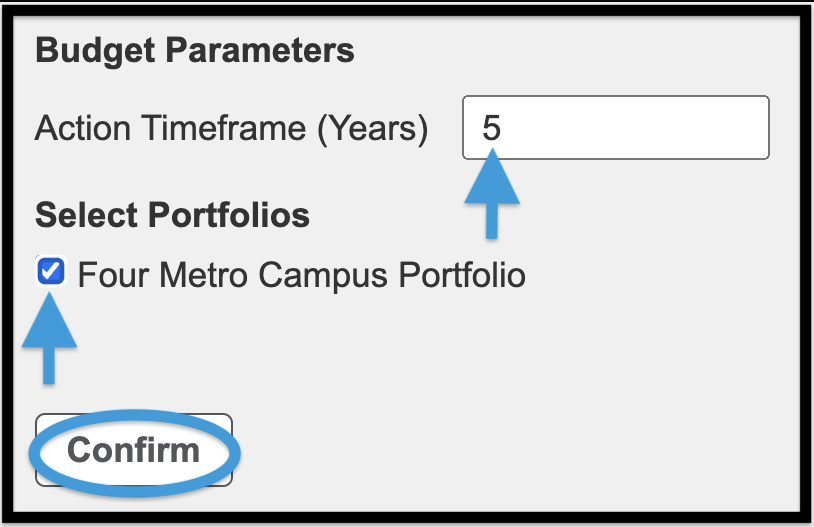
- Click Create New Budget.

- You will then be prompted to enter an Action Timeframe, in years, select the Portfolio, and confirm your selections.
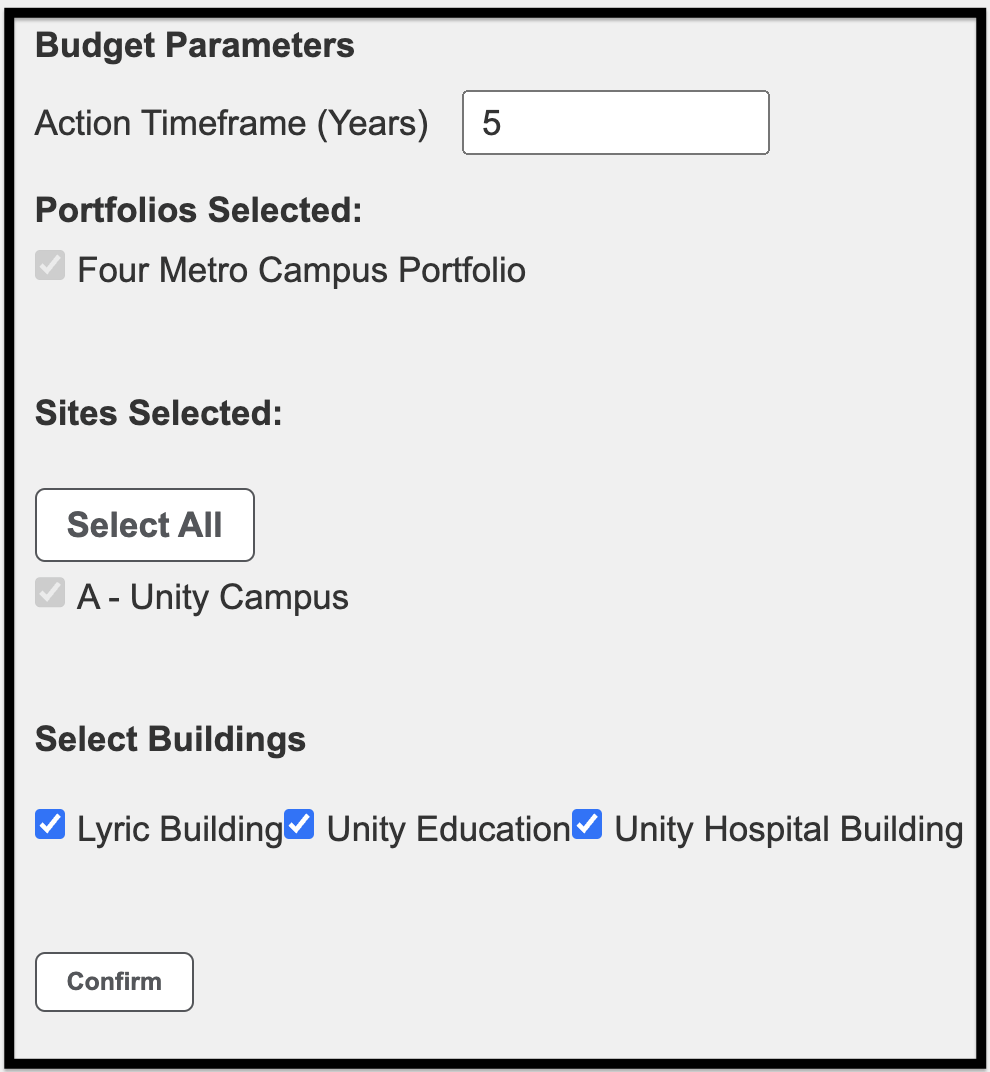
- You will then be prompted to select the Building(s) and confirm your selection.
- Click the Select All button to select all buildings.
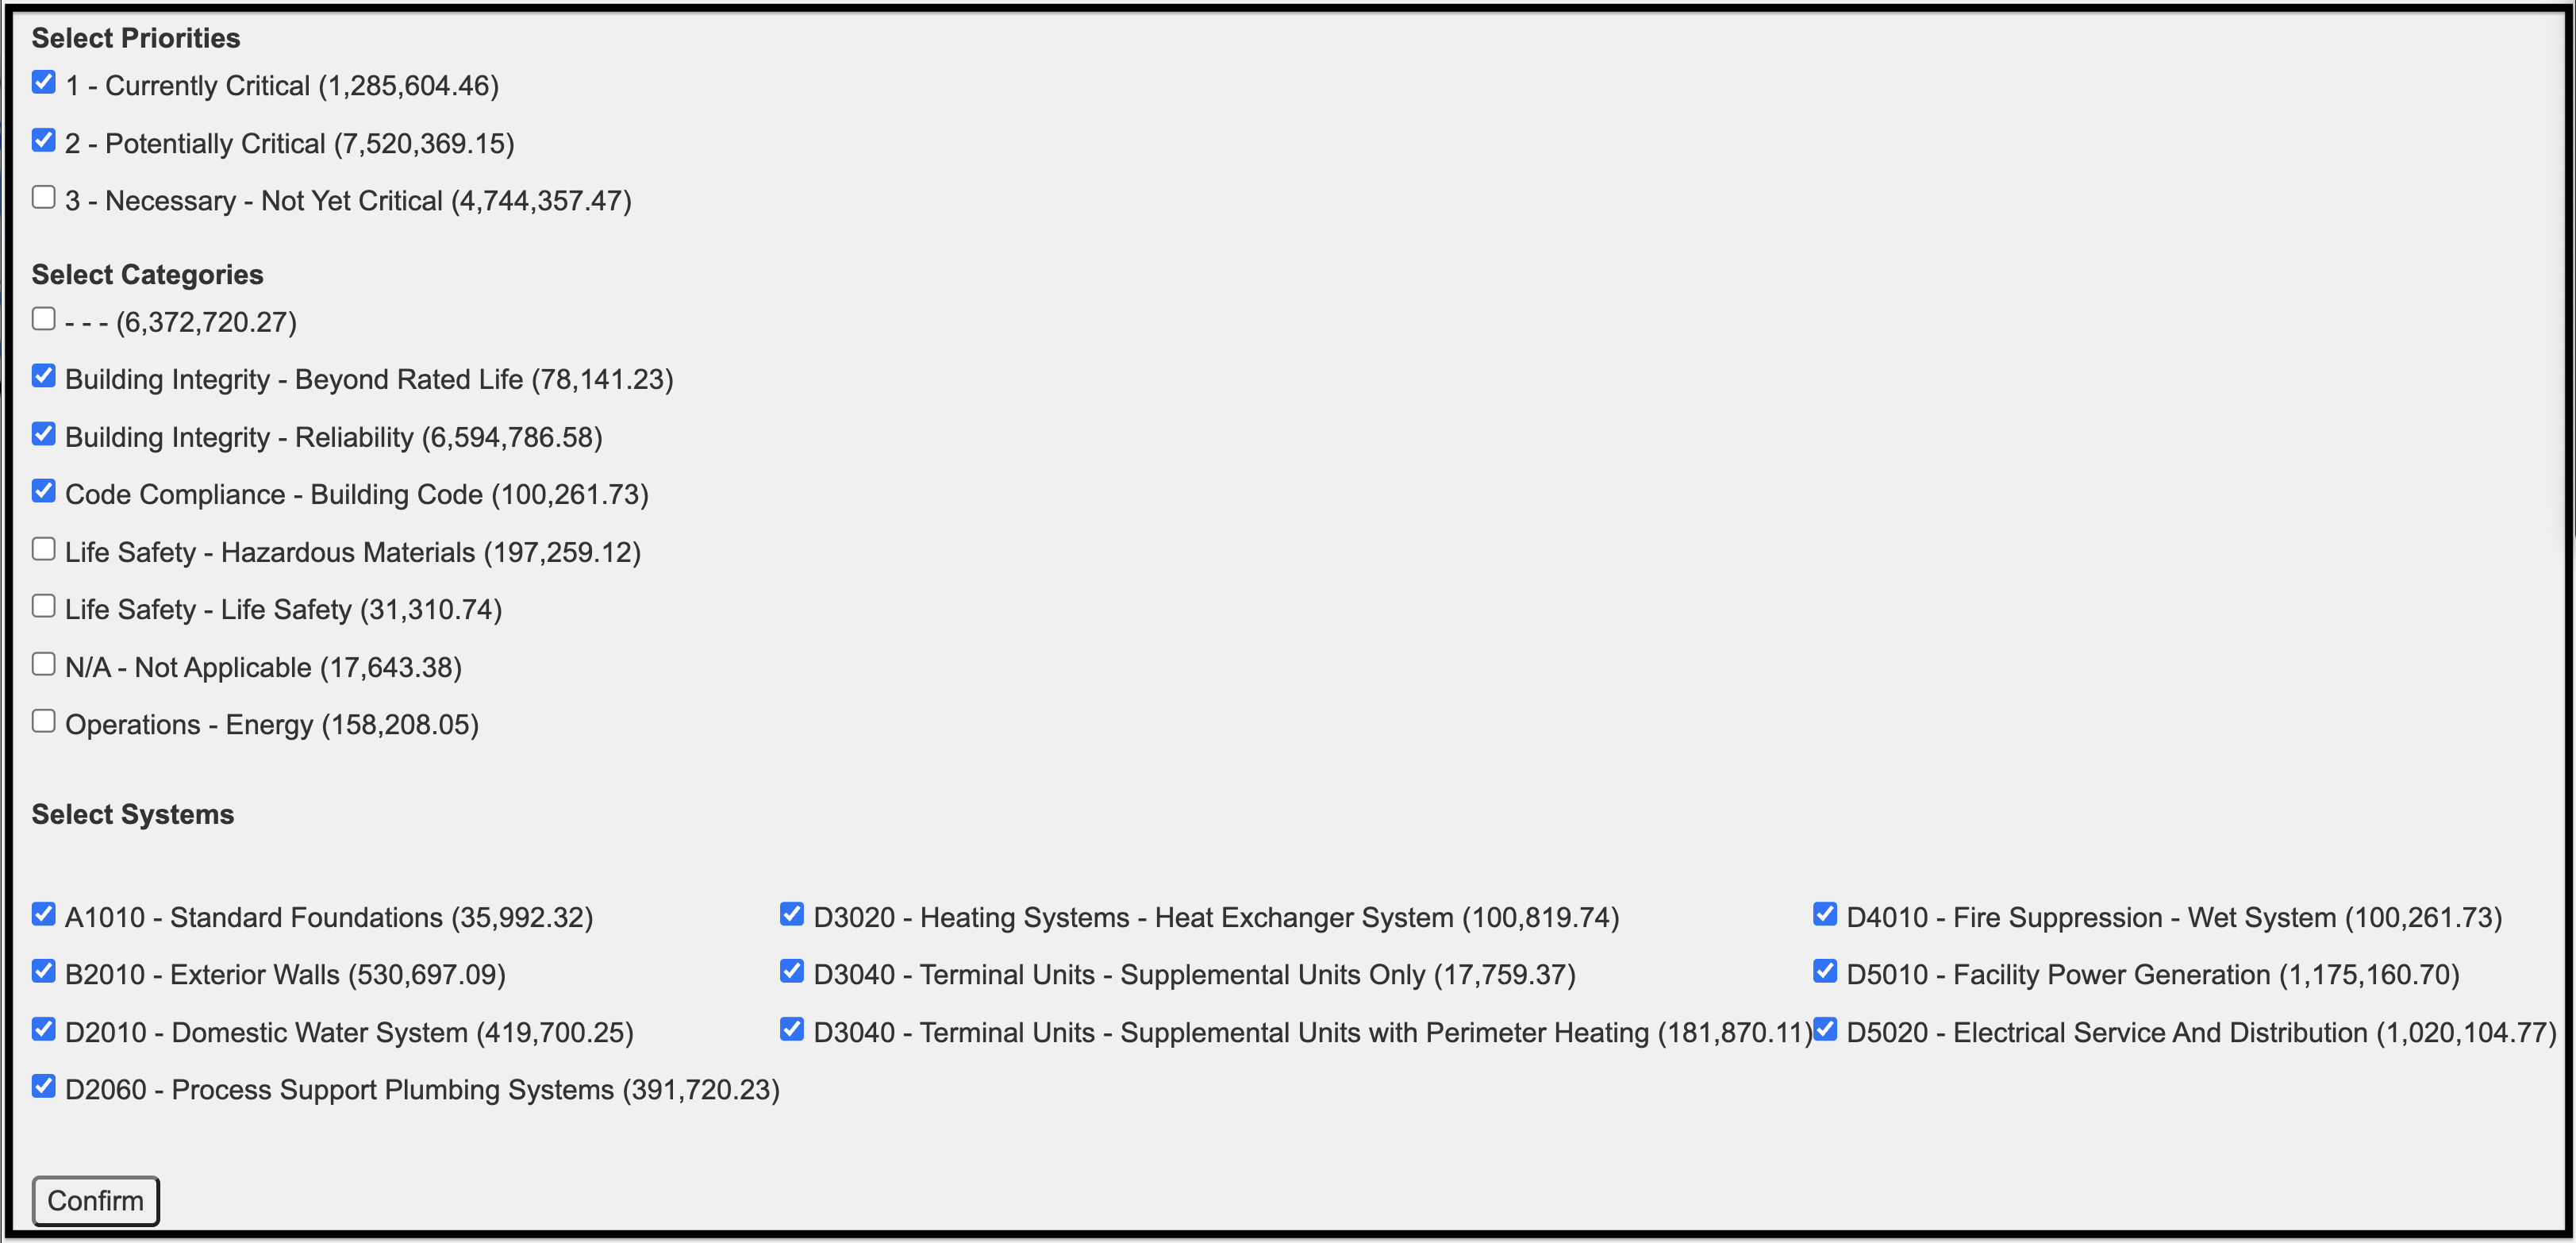
- All priorities (with values) will be displayed, as will all categories (with values).
- All checkboxes to the left of the priorities and categories will be selected by default.
- Select only those priorities and categories you want in the budget and confirm your selection.
- The action timeframe chosen determines which priority (or priorities) you will see.
- You will then be prompted to select the system(s) and confirm your selection.
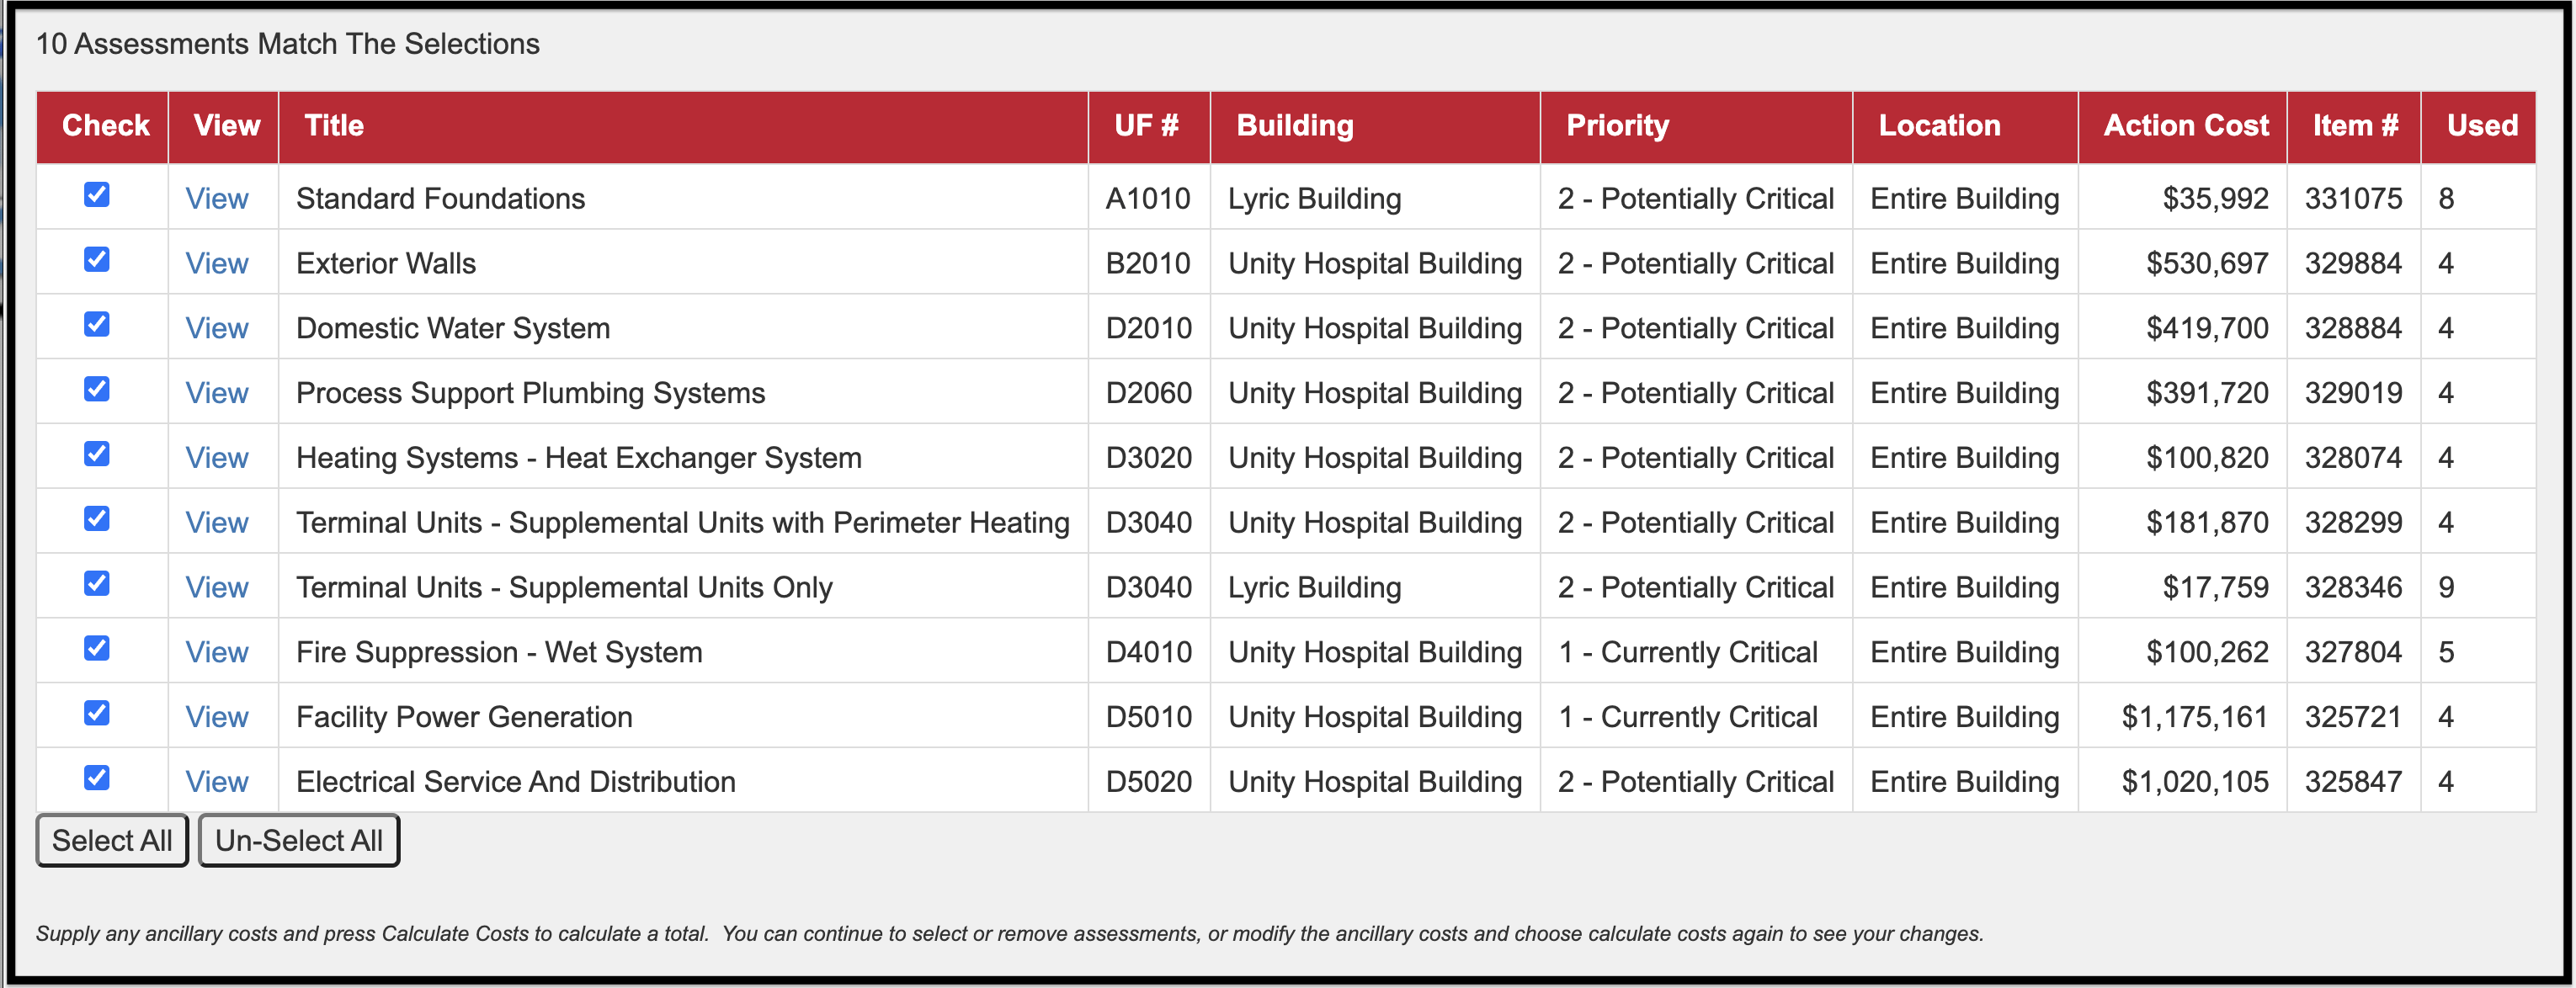
- All of the assessments that match the above selections appear in a grid.
- The grid displays the following information:
- View – Clicking on the Item ID will open the long assessment form. You can see all of the information for that item.
- Title
- Uniformat number (UF#)
- Building
- Priority
- Location
- Action Cost
- Item#
- Used – the Used category shows whether the assessment has been used (or saved) to a different budget and how many times it has been used (or saved).
- Click the checkbox to the far left of the assessment items that are to be included in the project.
- Click Select All to select all of the assessment items. Alternatively, click the Unselect All button to deselect all of the assessment items.
- At the bottom of the screen is the Save Budget Settings option.
- The following fields are included:
- Status: The status of the budget, i.e., Pending, Complete, etc.
- Budget Name: Designates a title for the budget.
- Description: A narrative describing the scope of work.
- Priority: A client-defined budget priority scheme.
- Funding Sources: Displays the anticipated sources of funds for the budget, i.e., Grant, State, etc.
- Start Year: The anticipated year the budget is to be implemented.
- To the right of Save Budget Settings are the fields that represent overhead costs that can be applied to the budget. These costs can be added as a percentage or as fixed costs.
- The item costs in the software are the direct costs.
- When all of the relevant information has been entered, click Calculate Costs.
- Values will appear on the right side of the page.
- Percent and Fixed Amount values can be adjusted. Each time the values are adjusted, you must click Calculate Costs to update the Total Cost.
- To save the budget, click Save Budget.
- You will then be re-directed to the Budgeting tab.
- The budget will appear in the list.
- To edit the budget, click Edit.
- The Edit page is identical to the Add page.
- If a user edits the budget, the budget will be saved as a new budget. The original budget will be maintained.
- To delete a budget, click Delete.
- To view the report for the budget, click View Report.
- The report opens as a PDF in a new window. You can download or print the report using the buttons on the top right of the screen.
- Below the budget list is an area to create a Capital Improvement Plan (CIP) by combining budgets.
- Click the checkbox to the left of each budget that will become part of the CIP.
- Enter the information for the following fields:
- Capital Project Name
- Starting Year
- Description
- Duration (Years)
- Click Create when complete.
- The report will automatically open as PDF in the current window.
- Click the back arrow to return to the previous page.
- You can download or print the CIP using the buttons at the top right of the screen.
© Copyright 2024, FOS of CannonDesign – All Rights Reserved – Confidential and Proprietary